 roundup
 10 Best Bed Adhesives for 3D Printers: Tested for Months
I bought every bed adhesive I could find and ran them all on my printers for months. Here are the 10 that actually hold your prints down without trashing your build plate.
The right accessories can make or break your prints. Here's what I've tested and what's genuinely worth the money.
We may earn a small commission through links on this page, at no extra cost to you. As an Amazon Associate, we earn from qualifying purchases. Ratings reflect our own editorial evaluation.
Nobody told me this when I started, so I'll tell you now. Your printer is only half the story.
I've watched folks drop $800 on a perfectly capable FDM machine, then feed it the cheapest Amazon filament they could find. Clogs, warping, failed prints, hours of frustration. Within a month they were ready to give up on the whole hobby.
The right accessories turn a miserable experience into something you actually look forward to. Decent tools, proper filament storage, and a handful of smart upgrades will improve your print quality more than buying a machine twice the price. I put together our full 25 must-have 3D printer accessories guide based on what we genuinely keep at arm's reach in the workshop, but this page covers the bigger picture that every printer owner should understand.
Let me start with the non-negotiables. Every printer owner needs a solid pair of flush cutters, a putty knife or print removal tool, and precision tweezers. You will reach for these on every single print.
After hand tools, a build surface upgrade offers the most bang for your buck. Replacing a stock build plate with a PEI spring steel sheet eliminates most bed adhesion frustrations practically overnight. I wasted way too much time fiddling with glue sticks and hairspray before switching, and honestly I wish I'd done it from day one.
Filament storage is something most people ignore until they've already ruined a spool. Moisture-damaged filament causes popping, stringing, and rough surface textures. A vacuum-sealed dry box with silica gel packets runs about $25 and saves you from tossing entire rolls of material in the trash. Check our complete accessories roundup for specific product recommendations across every category.
Get yourself a digital caliper on day one. It lets you verify dimensional accuracy, check filament diameter, and confirm tolerances on mechanical parts. You don't need anything fancy. A $15 stainless steel caliper from a reputable brand will do everything you need.
Filament is the one ongoing cost in 3D printing, and the brand you choose matters way more than most people think. Inconsistent diameter, sloppy moisture control during manufacturing, and tangled spools are problems that follow cheap filament home.
After pushing hundreds of spools through our test machines, certain brands have earned a permanent spot on the shelf. Here's what I reach for at every budget level.
Hatchbox is my go-to PLA pick for most people. Consistent quality, reasonable price, and a huge color selection. Diameter tolerance stays tight, and I've maybe had two bad spools across dozens of orders. Nothing else at this price point matches it for reliability.
eSun is the strongest budget contender, especially if you're doing high-volume printing and watching costs. Their PLA+ is surprisingly good, with noticeably better layer adhesion than standard PLA. Color consistency can drift slightly between batches, but for functional parts that won't matter.
Prusament sits at the top if you want the tightest quality control money can buy. Prusa produces it in-house with published diameter tolerances of plus or minus 0.02mm. Every spool ships with a QR code linking to its actual measurement data. It costs more, but for detailed miniatures or engineering prototypes, that precision is visible in the final product.
Polymaker makes outstanding specialty filaments. Their PolySmooth (PVB) can be vapor smoothed with isopropyl alcohol, and the PolyLite line covers PLA, PETG, and ABS at a fair mid-range price. If you want to branch out beyond basic PLA, Polymaker is a great place to start exploring.
Overture is another reliable budget brand. Their PETG is especially strong, and they throw in a build surface sample sheet with every spool. For anyone dipping a toe into PETG for the first time, Overture keeps the risk low.
One tip I give everyone: always buy 1kg spools instead of 250g samples when testing a new brand. The smaller rolls cost proportionally more and don't give you enough material to properly tune your settings. Half the spool vanishes just dialing things in.
Your material choice affects everything from surface quality to part strength, and picking the right filament for the job is half the challenge. Here's what years of testing have taught me about each type.
PLA is everyone's starting point, and it deserves that spot. Low print temperatures, no heated bed required, and barely any smell. It's ideal for prototypes, display models, and anything that won't face serious heat or mechanical load. Roughly 80% of what I print is still PLA.
ABS is the original 3D printing filament and still pulls its weight for functional parts needing heat resistance. The catch? It warps like crazy, smells awful, and practically demands an enclosure. Don't bother trying ABS on an open-frame printer unless you enjoy pulling failed prints off the bed.
PETG lands right between PLA and ABS. Stronger than PLA, better heat tolerance, and way less warping than ABS. I grab PETG whenever I need something food-safe adjacent or structurally tough. The one annoyance is that it strings more during printing.
TPU is your flexible filament option. Phone cases, gaskets, vibration dampeners, anything that needs to flex without snapping. You'll need patience and a direct-drive extruder (Bowden tubes and TPU really don't get along). But the finished results justify the learning curve.
Nylon is the real workhorse for demanding mechanical applications. Extremely strong, slightly flexible, and handles repeated stress better than any other common filament. The problem is that it absorbs moisture like a sponge. You'll need to dry it before every session and ideally print straight from a dry box. Temperatures run high, so an all-metal hotend is a must.
ASA is what you use instead of ABS when your parts live outdoors. Similar mechanical properties but vastly better UV resistance. Garden fixtures, drone frames, car accessories all belong in ASA territory. It still requires an enclosure, though warping is a bit less aggressive than ABS.
Specialty filaments like wood-fill, carbon fiber, and glow-in-the-dark unlock interesting creative options, but they demand hardened steel nozzles. Abrasive particles in these materials will chew through a standard brass nozzle in just a few prints. Save these for after you've nailed the fundamentals.
Every print starts at the build surface, and choosing the wrong one for your material causes more failures than any other single factor. I've run extensive tests on all the popular options, and each serves a specific purpose.
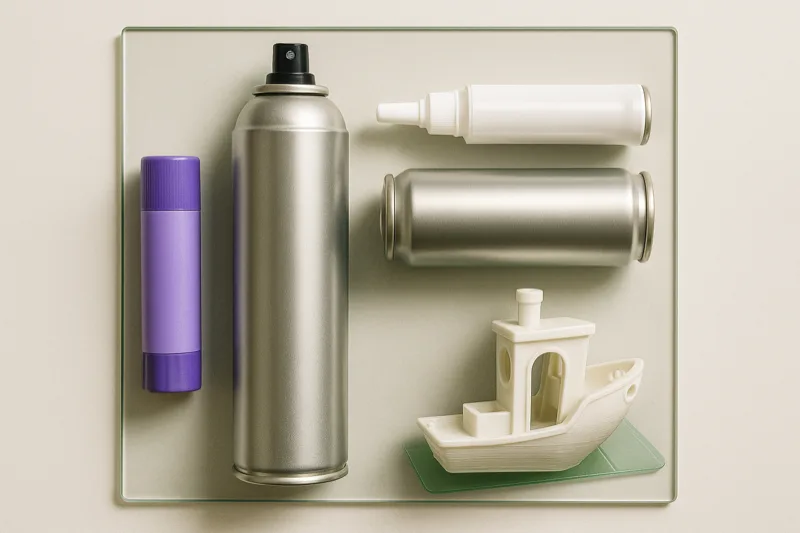
PEI (Polyetherimide) Spring Steel Sheets are what I tell most people to buy. PLA, PETG, and ABS all grip PEI reliably when hot, then release cleanly with a gentle flex once cool. Smooth PEI gives you a glossy bottom layer while textured PEI produces a matte finish. A quality PEI sheet lasts hundreds of prints with almost no upkeep. Just wipe it down with isopropyl alcohol between jobs.
Glass beds (plain or borosilicate) deliver a perfectly flat surface, which is their primary selling point. Flatness becomes critical on larger printers where minor warps in the aluminum bed telegraph into your first layer. A thin coat of glue stick or hairspray on glass gives solid PLA adhesion. The downside? Parts sometimes bond too aggressively, and removing prints can take more prying than you'd expect.
BuildTak and similar adhesive sheets had their moment before PEI went mainstream. They work reasonably well with PLA and ABS, but they degrade over time and need replacing every 50 to 100 prints depending on how aggressive your first layer is. That recurring cost adds up. I'd skip BuildTak and go straight to PEI unless your printer specifically needs it.
Painter's tape (blue tape) is the old-school approach that still works when you're in a bind. Great for PLA on unheated beds, dirt cheap, and available at any hardware store. It tears, wrinkles, and needs constant replacement though. Fine for beginners watching their budget, but you'll move past it quickly.
Glue stick isn't technically a surface but rather an adhesion aid that pairs with almost any surface. A thin layer of washable glue stick locks down PLA and PETG reliably. It also doubles as a release agent for PETG on PEI, preventing that material from bonding permanently to the sheet. Keep one handy regardless of your surface choice.
My setup for most people: a textured PEI sheet for everyday PLA and PETG, plus a smooth PEI sheet for detailed prints where you want that glossy bottom layer. Two sheets handle 95% of your printing needs.
The nozzle is the tiniest part on your printer yet it has an oversized effect on quality, speed, and material compatibility. Most machines ship with a 0.4mm brass nozzle, which is a solid starting point. But there's a lot more to explore once you know what you're after.
Brass nozzles are standard for good reason. Excellent heat transfer, low cost, and great results with PLA, PETG, ABS, and TPU. The weakness is that brass is soft. Abrasive filaments like carbon fiber, glow-in-the-dark, and metal-fill will eat through a brass nozzle in hours, wrecking your print quality. Keep a few spares around because they're essentially consumables.
Hardened steel nozzles handle the wear problem for abrasive materials. They'll outlast practically anything you run through them. The trade-off is marginally lower thermal conductivity compared to brass, so you may need to bump temps up 5 to 10 degrees. If you're printing specialty filaments with any regularity, hardened steel pays for itself quickly.
Ruby-tipped nozzles (like the Olsson Ruby) pair a brass body for heat transfer with a synthetic ruby insert for wear resistance. They're pricey ($80 to $100), but they combine the best qualities of both materials. I'd only suggest these for people running large volumes of abrasive filament on a high-end machine. For everyone else, switching between brass and hardened steel is the more practical route.
For sizing, here's the quick rundown. A 0.4mm nozzle is the standard and handles most jobs well. A 0.2mm nozzle produces incredibly fine detail for miniatures and text but quadruples your print time. A 0.6mm nozzle is my favorite for functional parts and vases, slashing print time nearly in half with barely any quality sacrifice. A 0.8mm or 1.0mm nozzle is purely for speed, large structural pieces, and prints where detail isn't a priority.
I always have three nozzles ready to go: 0.4mm brass for everyday PLA, 0.6mm brass for quick functional prints, and 0.4mm hardened steel for specialty filament work. That combination handles everything I throw at it.
Printer placement matters more than most beginners realize. I've seen machines running on wobbly folding tables, crammed into unventilated closets, and parked next to open windows with constant drafts. Every one of those setups creates problems.
Your printer needs a stable, level surface that won't vibrate. A solid workbench or heavy desk works perfectly. Stay away from hollow-core furniture because printer vibrations amplify through lightweight surfaces and show up as ringing artifacts in your prints. If a lighter table is all you've got, set a heavy concrete paver or stone slab under the printer to absorb the vibration.
Give yourself at least 6 inches of clearance on all sides for airflow and easy maintenance access. The back of the printer needs room for the spool holder, and you want unobstructed front access to the print bed.
PLA is generally fine for indoor use with minimal fume output. Even so, any closed room benefits from some airflow, whether that's a cracked window and a desk fan or something more substantial.
ABS and ASA are a completely different situation. They release volatile organic compounds (VOCs) including styrene, and printing them in an unventilated space is a genuinely bad idea. If ABS is a regular part of your workflow, install a proper exhaust fan that vents outdoors, or use an enclosure with a HEPA and activated carbon filter. The accessories you need for safe printing include filtration options at several price levels.
Resin printers (SLA/DLP) require even more serious ventilation attention. Liquid resin off-gasses significantly, and you should avoid all skin contact. A dedicated, well-ventilated workspace is absolutely mandatory for resin printing.
A typical FDM printer pulls 200 to 400 watts during operation, roughly comparable to a desktop computer. Plug into a quality surge protector, not a bargain power strip. Voltage spikes damage control boards and can corrupt prints mid-job.
Running multiple printers? Make sure you aren't overloading a single circuit. Three printers plus a computer and monitor on the same 15-amp circuit is pushing your luck. Spread the draw across separate circuits whenever possible.
Good lighting is seriously underappreciated. You need a clear view of your first layer to spot adhesion problems early. An LED desk lamp with an adjustable neck does the trick. Some people mount LED strips directly to the printer frame, which provides even illumination without shadows no matter where the print head travels.
3D printers run at high temperatures for hours on end, sometimes through the night. Fire safety deserves your attention. Keep a small fire extinguisher within easy reach of your print area. A smoke detector in the room is the bare minimum.
Never run a printer unattended on a combustible surface like a wooden desk without a fireproof mat underneath. Silicone heat-resistant mats made for soldering stations work great and cost under $15. Thermal runaway protection in your printer's firmware is also critical. If your machine doesn't have it enabled, update the firmware before running any long prints.
Not every upgrade makes financial sense for every printer. Dropping $60 on a titanium heatbreak for a $150 machine just doesn't add up. Here's what I suggest based on your printer's price bracket.
Focus on the fundamentals first. A PEI spring steel sheet ($15 to $25) is the single highest-impact upgrade for any budget printer. Bed adhesion headaches will practically vanish. After that, swap the Bowden tube for a Capricorn XS ($10). The tighter inner diameter reduces play and sharpens retraction performance with PLA and PETG.
Replace the stock plastic extruder with an all-metal dual-gear version ($15 to $20). Those plastic arms on budget machines crack within months, and the dual-gear design feeds filament far more consistently. Stiffer bed springs or silicone spacers ($5 to $8) replace the weak stock springs and hold your leveling longer between adjustments.
Total investment for all four: roughly $50 to $60. That takes a frustrating budget printer and makes it genuinely dependable. Our essential accessories guide lists specific product picks for each of these upgrades.
Machines like the Bambu Lab A1 or Prusa MK4 already handle the basics out of the box. At this level, your money goes further on workflow improvements and expanded material support.
An all-metal hotend unlocks high-temperature filaments like nylon, polycarbonate, and ASA. Plenty of mid-range printers still come with PTFE-lined hotends that top out around 240C. A drop-in all-metal replacement typically runs $25 to $50 depending on the machine.
A filament dry box with active heating ($40 to $80) lets you print hygroscopic materials straight from a moisture-controlled environment. This changes everything for nylon and TPU, which absorb moisture quickly enough to ruin a print mid-job if they're sitting out.
LED light bars on the frame ($15 to $25) make it vastly easier to monitor prints and inspect first layers. A webcam paired with OctoPrint or similar remote monitoring ($35 to $60 for a Raspberry Pi plus camera) lets you watch and cancel prints from your phone. At this price point, your time is worth more than the filament, so catching failures early really pays off.
Premium machines arrive mechanically refined. Upgrades here are about expanding what the printer can do and squeezing out the best possible quality.
A multi-material system (if your printer supports one) unlocks soluble supports, multi-color prints, and more complex geometry. The Bambu Lab AMS and Prusa MMU3 lead the pack right now. Budget $200 to $350 and plan to spend some time dialing in purge settings.
An enclosed print chamber with active filtration lets you run ABS, ASA, and polycarbonate without worrying about warping or breathing fumes. Some premium printers include enclosures from the factory. For those that don't, aftermarket or DIY builds range from $50 to $200 depending on size and features.
Hardened steel nozzles in multiple sizes (0.25mm, 0.4mm, 0.6mm) let you switch between detail work and speed runs on any material without restrictions. A quick-change nozzle system, if your printer supports one, turns swaps into a five-second job instead of a multi-minute affair.
Printers aren't appliances you can just set and forget. Consistent maintenance prevents expensive breakdowns and keeps quality where it should be. Here's the schedule I follow across every test machine in the workshop.
Give the build surface a quick visual check for scratches, debris, or leftover adhesive residue. Wipe the bed with isopropyl alcohol (90% or higher) to clear finger oils. Also confirm the filament isn't tangled on the spool. A tangle mid-print is a guaranteed failure, every time.
Inspect the nozzle. Heat it to printing temperature and look for any oozing around the heat block connection, which means a loose nozzle or heat break. Run a nozzle cleaning needle through to clear partial clogs. If extrusion seems uneven, do a cold pull with cleaning filament to flush out debris.
Verify your bed level. Even with auto bed leveling, it's smart to confirm nothing has shifted. Print a first-layer test and adjust accordingly. On manual-leveling machines, plan on checking this every few days at least.
Test belt tension on all axes. Belts gradually stretch, and loose belts cause dimensional drift and ringing artifacts. The belt should make a low twang when plucked, like a bass guitar string. Most printers include a tensioning mechanism you can adjust without tools.
Apply lubricant to linear rails and lead screws. Use light machine oil or white lithium grease (not WD-40, which attracts dust). A single drop per rail, worked in by moving the axis back and forth, is plenty. Over-lubricating creates more issues than it prevents.
Inspect the PTFE tube (on Bowden printers) for deformation or discoloration near the hot end. The tube breaks down over time, especially if you've been printing above 230C. A worn tube leads to clogs and inconsistent extrusion. Swap it out if the inner bore looks ovalized or darkened.
Tighten any hardware that's worked loose on the frame and gantry. Vibrations gradually loosen screws, and loose fasteners translate directly into print quality problems. A quick pass with the right hex key takes two minutes.
Once every three months, go deeper. Pull the hot end apart and clean out accumulated filament residue. Inspect the heat break for cracks or partial blockages. Look over the heater cartridge and thermistor wiring for any signs of damage.
Remove the build plate and clean the bed heater surface underneath it. Dust and debris collect there and can affect heating evenness over time. Check all wiring for chafing, particularly around moving parts where cables flex repeatedly.
Install firmware updates if a stable release is available. Manufacturers regularly patch bugs and improve performance. Just back up your calibration settings before updating, since some releases reset everything to factory defaults.
This schedule sounds like a lot written out, but individual tasks only take a few minutes. Half an hour of monthly prevention saves you hours of chasing mysterious print failures down the road. I learned that lesson the expensive way, and it's something I also touch on in our recommended 3D printing books roundup.
A print fresh off the bed is rarely a finished product. Layer lines, support scars, and rough edges come with the territory in FDM printing. With the right tools and a bit of patience though, you can produce parts that look factory-made.
Begin with 120 grit sandpaper to level out prominent layer lines and support remnants. Progress through 220, 400, 600, and up to 1000 grit for a polished finish. Wet sanding at the finer grits (400+) keeps the paper from clogging and produces a smoother, more uniform surface. It's tedious work, but the transformation is genuinely impressive.
Flexible sanding sponges handle curved surfaces and tight spots better than flat sandpaper. Needle files are a must for cleaning up holes and slots that sandpaper simply can't reach.
Filler primer spray paint (like Rust-Oleum Filler Primer) pulls double duty. It fills fine layer lines while creating a uniform base for your final paint coat. Apply two to three light coats, sanding gently with 400 grit between each one. Heavy coats bury detail, so restraint is your friend here.
For deeper layer lines or visible seams, automotive body filler (Bondo) or spot putty fills the gaps nicely. Apply a thin layer, let it cure completely, then sand smooth. It adds time to the process but makes layer lines totally invisible on the finished piece.
Acrylic spray paints work well on primed PLA and PETG surfaces. For detailed work on miniatures and cosplay props, brush-on acrylics (Citadel or Vallejo are both solid) give you the precision you need. Always prime first. Paint adhesion on bare PLA is poor and will chip off with regular handling.
Clear coat finishes the job. Matte clear coat conceals remaining imperfections, while gloss gives a professional sheen. Two light coats provide reasonable durability for display pieces. For parts that'll get handled regularly, three to four coats hold up much better.
This is the most dramatic finishing method available for FDM prints. Acetone vapor melts the outer layer of ABS plastic, blending layer lines into a smooth, glossy surface. The finished result honestly looks injection-molded.
The basic setup uses a glass jar lined with an acetone-soaked paper towel, set on a slightly warm surface. Place the ABS part inside, cover with the jar, and check every 5 to 10 minutes. Over-smoothing dissolves detail, so timing is everything. Always do this in a well-ventilated space since acetone fumes are both flammable and harmful to breathe.
You can also apply acetone directly with a brush for more targeted smoothing of specific areas. This works well for seams and obvious layer lines without affecting the whole surface. Practice on scrap parts first because it's very easy to overdo it.
Epoxy coating creates a thick, durable, glossy shell over any filament type. XTC-3D is formulated specifically for 3D prints and self-levels to fill layer lines. It does add roughly 0.5mm of thickness, so factor that into your design tolerances.
Heat gun smoothing technically works on PLA, but it's incredibly easy to warp or melt the part. I wouldn't recommend it for anything beyond quick cosmetic touch-ups on non-critical surfaces. If you're investing finishing time, sanding and priming deliver far more predictable outcomes.
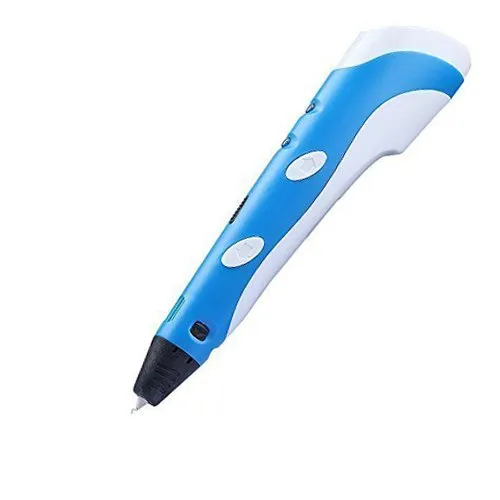
3D pens deserve more credit than they get. They're not competing with printers. They serve an entirely different purpose.
I originally picked one up to repair and weld printed parts, which it handles nicely. Then I started using it for freehand art projects and quick prototyping when firing up the slicer felt like overkill. They're also brilliant for kids who aren't quite ready for a full printer setup.
If you're looking for a gift for someone interested in 3D printing (or just curious about it), a quality 3D pen is a genuinely thoughtful choice. Just steer clear of the ultra-cheap models that jam constantly. I've tested a broad range and documented which ones actually perform in our 20 best 3D printing pens review. Temperature control and nozzle quality vary hugely between brands, and the difference in user experience is night and day.
For teachers and parents, 3D pens offer a low-cost gateway into spatial thinking and design. Several educators have told me they bring them into STEM classes to help students grasp three-dimensional building before jumping to CAD software. Our 3D pen roundup includes recommendations at every price point.
YouTube is great for solving an immediate problem, but it won't build the deeper understanding that separates a tinkerer from someone who can actually engineer functional parts. That's where books come in.
Early on, I learned slicer settings purely through trial and error because I didn't know any better. It wasn't until I sat down with a proper 3D printing book that I started understanding the "why" behind certain settings. After that, the lightbulb moments came fast.
The best books cover everything from FDM fundamentals to CAD modeling to the business side of selling printed products. Whether you just unboxed your first printer or you've been at this a year and want to push further, there's a book that'll accelerate your progress faster than grinding through random forum threads. I've reviewed my favorites in our 10 best 3D printing books guide. A couple of those titles genuinely reshaped how I think about print design.
If you've got a new printer and you're still sorting out the basics, grab a beginner-focused book from that list before diving into advanced topics. A solid foundation up front saves you weeks of frustrating troubleshooting.
I used to ignore maintenance until something broke. That's the expensive way to learn, and I don't recommend it. These days I keep a dedicated toolkit beside every printer, and my machines stay healthier far longer because of it.
Nozzle cleaning needles and cold-pull filament are critical for clearing partial clogs before they become total blockages. The right hex keys and socket wrench for your nozzle let you do hot-end swaps without stripping anything. Linear rail and lead screw lubricant keeps motion smooth and quiet.
A basic digital caliper (nothing expensive) lets you check dimensional accuracy and fine-tune slicer settings. And a good set of precision files makes quick work of support marks and visible layer lines. We break down specific tool recommendations in our 25 must-have accessories guide.
Buying cheap filament to save money. I understand the impulse. Filament costs pile up. But bargain-bin spools with inconsistent diameter and moisture problems will waste more material in failed prints than you'll ever recoup on the lower spool price. Stay with trusted brands like the ones I listed in the filament section above.
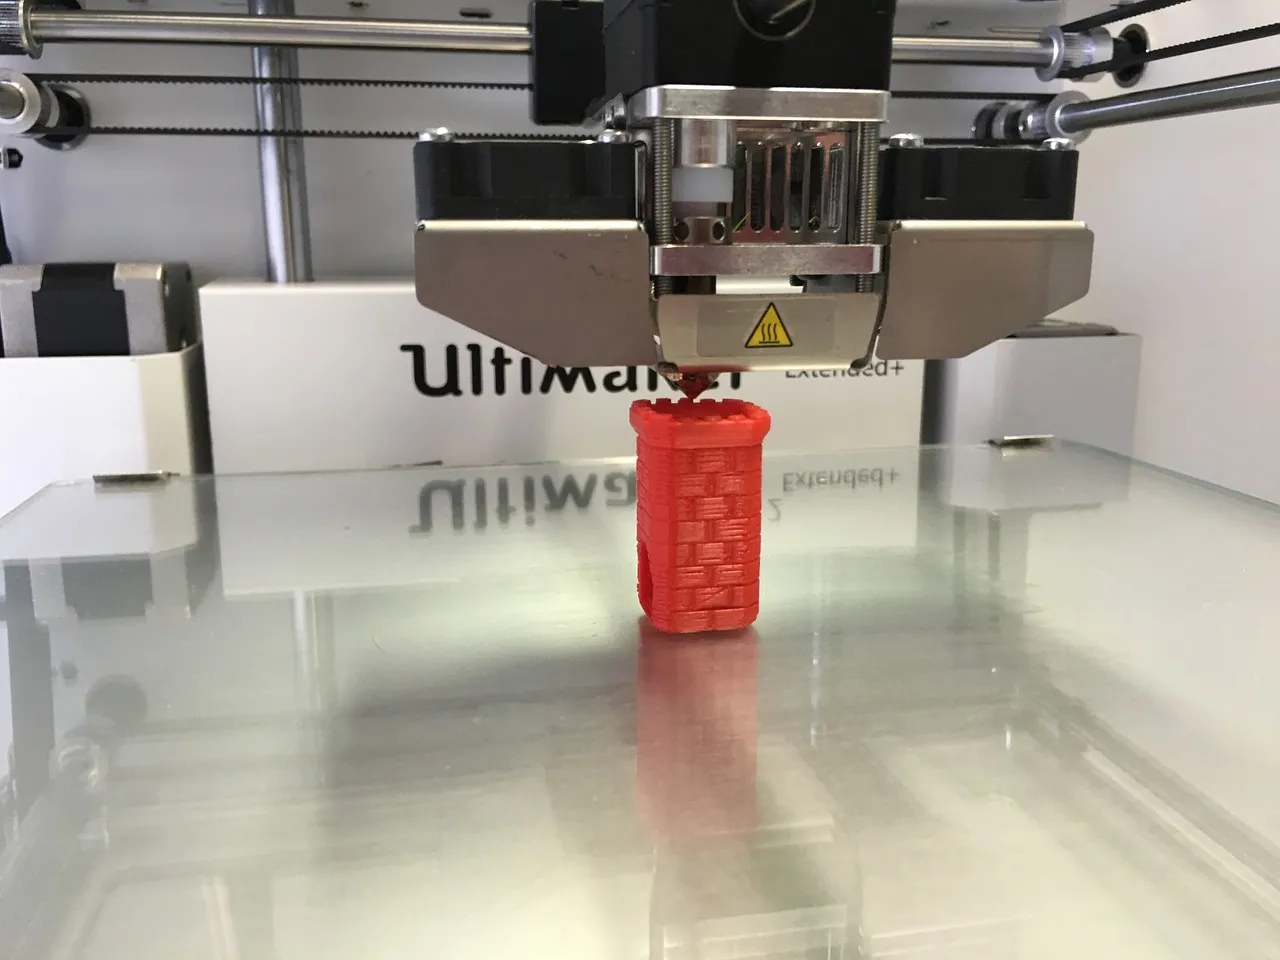
Skipping bed adhesion solutions. Stock build surfaces work fine initially, but they wear down. A PEI sheet, glass bed with adhesive, or even a reliable glue stick routine will eliminate the single most common cause of print failure: parts detaching from the bed mid-print.
Running ABS without an enclosure. I mentioned this earlier, but it's worth saying again. ABS warping and layer splitting on an open-frame printer isn't a question of "if" but "when." Even a basic enclosure built from an IKEA Lack table does the job. Don't skip this.
Ignoring filament storage. Nylon and TPU are the worst culprits, but even PLA soaks up moisture over weeks of sitting exposed. If your prints suddenly start popping and the surface looks rough after the filament sat out for a month, moisture is almost certainly to blame.
Using brass nozzles with abrasive filament. I see this in forums constantly. Someone runs a roll of glow-in-the-dark through their brass nozzle, then can't figure out why their regular PLA prints look terrible afterward. The nozzle is worn out. Switch to hardened steel before running anything abrasive through your machine.
Skipping maintenance entirely. Your printer is a precision machine with moving parts, heated components, and tight tolerances. Neglecting maintenance until something fails means longer downtime, costlier repairs, and mediocre print quality along the way.
Not investing in learning. Tools and materials can only carry you so far. The best 3D printing books and structured learning resources will grow your skills faster than years of scattered troubleshooting.
Every accessory recommendation on this site comes from actual hands-on use during real print jobs. We don't just unbox products and write snap impressions. That's not useful to anyone.
Tools get used for weeks across multiple printers and filament types. We deliberately push them hard to find where they break down. Filament goes through temperature towers, bridging tests, and extended print runs. Build surfaces log at least 50 prints before we commit to any judgment on durability and adhesion quality.
For 3D pens, we measure heat-up time, temperature stability, clogging frequency, and how the pen feels in your hand after 30 minutes of continuous drawing. You can see how that testing played out in our 3D pen comparison. For books, I read them front to back and evaluate whether the content is genuinely practical or just padding.
The goal is straightforward: point you toward the gear that works and steer you away from the stuff that doesn't. Browse the reviews below to find what your particular setup needs.
roundup I bought every bed adhesive I could find and ran them all on my printers for months. Here are the 10 that actually hold your prints down without trashing your build plate.
 roundup
 We bought and tested all 20 of these 3D pens. Some were great, some were a waste of money. Here's which ones are actually worth it.
 roundup
 These 25 accessories are the ones we actually keep in our workshop. Skip the gimmicks, these tools genuinely improve your prints.