What Our 3D Printing Guides Actually Cover
I've spent years messing around with 3D printers, and the one constant is that there's always something new to figure out. These guides exist for people who want straight talk and real solutions, not recycled spec sheets.
Whether you just pulled your first printer out of the box or you've been printing for months and want better results, this is the place. We cover everything from how to get started with 3D printing to troubleshooting tricks that took me far too many failed prints to learn.
None of this is lifted from a product manual. It all comes from actual testing, real mistakes, and the kind of trial and error you can only get by running machines day after day.
Getting Started: What to Actually Expect
Nobody warns you about this upfront. Your first print is probably going to look pretty rough, and that's totally fine.
New users tend to assume you just plug in the printer, press go, and get something amazing within an hour. Reality is more like a weekend of assembling, leveling, and tossing a couple of test prints that didn't quite work out.
But once it starts clicking, it really does click. A solid beginner walkthrough can take you from zero experience to genuinely good prints within about two weeks of casual use.
Start with simple stuff and build from there. Jumping straight into a full helmet on your first day is a recipe for frustration.
That first successful print, even something basic like a calibration cube, feels surprisingly rewarding. Watching a machine build a physical object out of thin air is one of those things that just doesn't get old.
I still catch myself watching my printers run after all these years. When you unbox yours, set it up on a sturdy, level surface with decent lighting and enough elbow room.
Pretty much every printer needs some assembly, even the ones marketed as "ready to print." Set aside a couple of hours for setup, bed leveling, and loading that first spool of filament.
Slicer Software Comparison: Finding the Right Tool
Your slicer is what sits between a 3D model and an actual physical print. It takes your model file and converts it into step-by-step instructions your printer can follow, one layer at a time.
Picking the right slicer can seriously improve your print quality without touching a single piece of hardware. Here's how the four main options compare based on my time with each.
Cura
UltiMaker Cura is the most widely used slicer out there, and it earned that spot. It's totally free, compatible with just about every FDM printer, and backed by a huge community building profiles and plugins.
The beginner mode keeps things clean and simple, tucking away hundreds of advanced settings until you're ready to explore them. The built-in profiles for popular printers are surprisingly dialed in from the start.
The trade-off? It can bog down on older computers, especially with big or detailed models. And updates occasionally break profiles that were working perfectly, which gets annoying fast.
Best for: beginners and anyone who wants tons of ready-made printer profiles without fiddling.
PrusaSlicer
PrusaSlicer began as Prusa's own tool, but it's grown into one of the strongest slicers available for any brand of printer. It's free, open-source, and consistently gets meaningful updates.
The paint-on support feature is a standout. Rather than letting the slicer throw supports everywhere automatically, you can brush them on exactly where they're needed.
Organic tree-style supports in PrusaSlicer work really well. They burn through less filament, print quicker, and pop off cleaner than old-school block supports.
Best for: intermediate users who want fine-tuned support control and a slicer that runs fast and light.
OrcaSlicer
OrcaSlicer is the open-source option that's been picking up serious momentum lately. It's forked from PrusaSlicer and BambuStudio, pulling the strongest features from both into one package.
The built-in calibration tools are outstanding. You can run flow rate tests, pressure advance tuning, and temperature towers right inside the slicer without hunting down separate test files.
Multi-color printing support is better here than in any other free slicer I've tried. If you're running a Bambu Lab machine or anything with an AMS, OrcaSlicer handles it seamlessly.
Best for: power users chasing the newest features and built-in calibration workflows.
Simplify3D
Simplify3D is the only paid slicer on this list at about $50. It used to be the top choice for advanced users, but honestly, it hasn't kept up with the free competition.
The process system that lets you apply different settings to different sections of a print still has its uses. But PrusaSlicer and OrcaSlicer now offer similar capabilities at no cost.
I can't justify recommending a purchase when the free slicers have gotten this good. If you already have a license, it still works fine, but switching to it from Cura or PrusaSlicer in 2026 doesn't make much sense.
Best for: people who already own it and are used to the workflow.
Print Settings Deep Dive
Getting your settings right matters more than anything else for print quality. Hardware plays a role, sure, but a well-tuned budget printer will beat an expensive machine running sloppy settings every single time.
These are the settings you'll tweak most often, along with what each one actually does to your output. For the practical side of putting these to work, our essential printing tricks guide goes deeper.
Layer Height
Layer height controls how thick each individual layer of plastic is. With a standard 0.4mm nozzle, you can work anywhere between 0.08mm and 0.32mm.
Thinner layers (0.08mm to 0.12mm) produce smoother surfaces with finer detail, but they take much longer to print. A model that finishes in 4 hours at 0.2mm could easily take 10+ hours at 0.08mm.
For everyday functional prints, 0.2mm hits the sweet spot. Decent quality, reasonable speed.
If you're printing display pieces, miniatures, or anything where surface detail matters, drop down to 0.12mm or below. The jump in quality is obvious the moment you hold the part.
Infill Percentage and Pattern
Infill is the internal structure inside your print. At 100% the inside is totally solid, while 0% leaves it completely hollow.
For most projects, 15% to 20% infill does the job. You get solid internal strength without burning through filament or adding tons of print time.
Parts that need to handle load or stress should go up to 40% to 60%. Printing fully solid at 100% is almost never necessary and chews through material.
The pattern you choose matters too. Grid is the standard default and works for most things. Gyroid infill is stronger in every direction and looks wild if you print a vase in transparent filament. Lightning infill is the quickest option when all you need is enough structure to hold up the top layers.
Wall Count and Thickness
Walls (sometimes called perimeters) form the outer shell of your print. More walls mean a tougher, more rigid part. Three or four walls is the norm for most things.
For thin items like vases or enclosures, two walls with infill providing the backbone can work. For load-bearing pieces, push it up to five or six walls.
Here's something worth knowing: wall thickness affects strength more than infill does. If you need a sturdier print, adding walls is nearly always more effective than cranking up infill.
Support Structures
Supports are temporary scaffolding your printer builds underneath overhanging sections. Anything that juts out past roughly 45 degrees from vertical typically needs support material below it.
Tree supports are the way to go for almost everything I print these days. They're faster, use less plastic, and leave fewer scars on the finished part than old grid-style supports.
The support interface layer, where the support actually touches your print, makes a big difference. Dialing down the interface density makes supports way easier to peel off, or you can add a one-layer gap between the support and your model.
Print Speed
Faster is not automatically better. Most printers put out their best work between 40mm/s and 60mm/s for outer walls, with infill running faster at 80mm/s to 120mm/s.
Newer machines from Bambu Lab and Prusa can blast past 200mm/s with input shaping enabled, but that takes careful tuning. Cranking speed on a printer that isn't built for it creates ringing artifacts and weak layer bonding.
My honest advice if you're starting out: run slower than whatever the default settings recommend. You can chase speed later once you've gotten a feel for your machine.
Temperature Settings
Every filament type has a preferred temperature range, and even two brands of the same material can behave differently at the same temp.
PLA usually prints between 190C and 220C, with 200C to 210C working for most brands. PETG runs hotter at 230C to 250C. ABS wants 230C to 260C with a heated bed at 90C to 110C.
Bed temperature matters just as much. PLA sticks well at 50C to 60C. PETG likes 70C to 80C. Too much heat on the bed and you'll end up with elephant foot on your first layers.
Whenever you crack open a new filament brand, print a temperature tower first. It takes about 30 minutes and shows you exactly where that particular spool performs best.
Complete Troubleshooting Reference
Every 3D printer owner hits problems sooner or later. This is my full reference for every common issue, what's behind it, and how to fix it. I've personally fought through every one of these, most of them more than once.
Stringing and Oozing
Those thin wispy threads between sections of your print look awful, but this is one of the simplest problems to knock out. Stringing happens when molten filament dribbles from the nozzle during travel moves.
Start by bumping up retraction distance. Bowden tube setups usually need 5mm to 7mm. Direct drive extruders do fine with 0.5mm to 2mm.
Retraction speed plays a role too. Begin at 25mm/s and work your way up to 45mm/s. Still seeing strings? Drop your hotend temperature by 5C at a time until they go away.
Turning on "combing" or "avoid crossing perimeters" in your slicer also helps a ton. It routes travel moves through the inside of the print rather than open air, hiding any ooze where nobody will see it.
Warping
Warping is when the edges of your print curl away from the bed. It happens because upper layers contract as they cool and tug the corners upward.
ABS is the biggest culprit here, but even PLA can warp on large flat parts. An enclosed printer or even a cardboard box placed around your machine helps keep the temperature stable.
A properly heated bed is critical. Make sure your bed temp matches your filament and that the surface is clean. A quick wipe with isopropyl alcohol before each print makes a real difference.
Brims are your go-to weapon for warp-prone prints. A 5mm to 10mm brim gives the print a much bigger footprint on the bed, anchoring those edges down. Rafts work as well but waste more filament and leave a rough bottom.
Layer Shifts
Mid-print, your model suddenly looks like it got shoved sideways. This is almost always mechanical, not a slicer or software issue.
Check belt tension first. Loose belts are the top cause by far. They should be snug and give a low twang when you pluck them, kind of like a guitar string.
A wobbly table or the printer vibrating itself across a slippery surface can trigger shifts too. Place your printer on something solid and heavy, or add rubber feet to absorb vibrations.
Stepper motor current set too low also causes missed steps. This pops up a lot on budget printers that ship with conservative motor driver settings. If belt tension checks out, look into your firmware's stepper current values.
Under-Extrusion
Under-extrusion looks like gaps in your walls, missing layers, and parts that are thin and fragile overall. Your printer simply isn't pushing enough filament through the nozzle.
A partial nozzle clog is usually the culprit. Do a cold pull (heat the nozzle, push filament in, let it cool, then yank it out) to pull debris free. If that doesn't solve it, swap in a new nozzle.
Confirm your filament diameter setting matches the actual filament. Most spools are 1.75mm, but measure yours with calipers. Cheap filament can vary by 0.1mm or more, and that absolutely throws off extrusion.
Your extruder gear might be worn or the tension might be off. If the gear is grinding into the filament (commonly called "chewing"), either the tension is cranked too high or a partial clog is creating back-pressure.
Elephant Foot
Elephant foot is when the first few layers of your print swell outward, making the base wider than the rest of the model. It's caused by the nozzle squishing the initial layer too flat or the bed running too hot.
Try dropping bed temperature by 5C to see if it clears up. You can also set a small elephant foot compensation value in your slicer, usually 0.1mm to 0.2mm is enough, which slightly shrinks the bottom layers to offset the bulge.
Double-check that your Z-offset isn't set too close. The first layer needs to press into the bed enough for adhesion, but not so much that it's totally flattened.
Ghosting and Ringing
Ghosting (or ringing) appears as wavy ripple patterns on flat surfaces, typically near sharp corners or raised lettering. Vibrations in the frame or motion system are the root cause.
Reducing print speed cuts ghosting right away. If sacrificing speed isn't an option, enable input shaping (sometimes called resonance compensation) in your firmware. Klipper does this exceptionally well with its built-in calibration process.
Making sure belts are tight and the frame is rigid goes a long way too. Some printers see real improvement from aftermarket braces or frame stiffening mods.
Poor Bed Adhesion
Your print starts looking fine, then pops loose from the bed halfway through and ruins the whole thing. This is the single most frustrating issue new users run into, and it's almost always solvable.
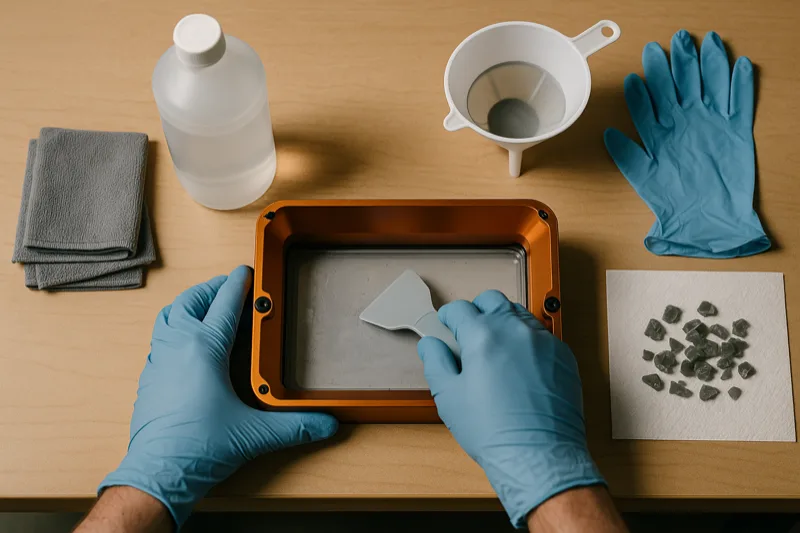
Wipe your bed with isopropyl alcohol (90% or higher) before each print. Fingerprints and leftover residue from previous prints are invisible but absolutely wreck adhesion.
Check that your bed is leveled properly. Being off by just 0.1mm across the surface can cause one corner to lose grip entirely. Level more frequently than you think is necessary, especially on printers without automatic bed leveling.
If cleaning and leveling don't do the trick, try a bed adhesion helper. Regular school glue sticks, hairspray, or purpose-built 3D printing adhesion sheets can transform your first-layer game. Our 3D printing tricks guide covers more adhesion techniques.
Z-Banding and Inconsistent Layers
Z-banding shows up as visible horizontal ridges repeating at regular intervals on the surface of a print. The usual suspect is the Z-axis lead screw or how it's mounted.
Verify your lead screw is straight and that the brass nut moves freely without binding. A thin coat of PTFE-based lubricant on the lead screw can smooth out movement considerably.
Filament that's absorbed moisture can also cause inconsistent layer quality. If some sections look fine and others are rough or bubbly, dry your filament before you start blaming hardware.
Clogged Nozzle
A full clog means zero filament comes out. A partial clog gives you inconsistent, sputtering extrusion that ruins surface quality.
Cold pulls clear most partial clogs. Heat your nozzle to printing temp, manually push some filament through, cool the nozzle down to about 90C (for PLA), then pull the filament out firmly. The cooled plastic grabs debris on the way out.
For really stubborn clogs, grab an acupuncture needle or the cleaning pin that shipped with your printer. Poke it up through the hot nozzle to break up the blockage.
Preventing clogs beats fixing them. Don't leave filament sitting in a hot nozzle for long stretches, and avoid running dirty or dusty filament through your machine. A simple filament dust filter (you can print one yourself) prevents a lot of headaches.
3D File Formats Explained
Spend any time on a model download site and you'll run across files in several different formats. Here's what each one actually is and when to use it.
STL (Standard Tessellation Language)
STL is the workhorse format for 3D printing and has been for decades. Virtually every slicer, model library, and CAD tool supports it without issue.
STL files describe a model's surface geometry using triangles. They don't carry color, texture, or material data. Just the raw shape.
The downside is that STL files can get large for detailed models, and you can't pack multiple objects with different settings into one file. For most hobbyist work though, STL covers everything you need.
3MF (3D Manufacturing Format)
3MF is the newer standard that improves on STL in almost every way. It stores color data, print settings, multiple objects, and even support structures in a single compressed file.
When you save a project in Cura or PrusaSlicer, it's usually saved as 3MF. That means you can hand someone a file and they get your exact configuration, not just the geometry.
If a model comes in both STL and 3MF, go with the 3MF. Smaller file, more useful information baked in.
OBJ (Wavefront Object)
OBJ files show up more often in 3D animation and game design than in printing, but they still pop up. They can carry color and texture data, which STL lacks.
Most slicers import OBJ files without any hassle. They sometimes get used for multi-color printing projects where the color info is embedded directly in the model.
G-code
G-code is what your slicer spits out at the end. It's not a 3D model format at all. It's a list of machine instructions telling your printer where to move, how fast, and how much plastic to push.
You should generally avoid downloading or sharing G-code. It's built for a specific printer, nozzle size, filament, and configuration. Someone else's G-code might work on your machine, or it might ram the nozzle straight into the bed.
Slice models yourself from STL or 3MF files so the output actually matches your setup.
CAD Software Recommendations
At some point you'll want to design your own models instead of just downloading other people's work. CAD software ranges from incredibly simple to seriously powerful, and the best pick depends on your skill level and goals.
Tinkercad (Beginner)
Tinkercad is free, runs in your browser, and you can pick up the basics in about 15 minutes. It works on a drag-and-drop system where you combine basic shapes into more complex objects.
It's great for straightforward functional prints like brackets, boxes, wall mounts, and cable organizers. Kids take to it naturally, making it a solid way to get them into the design side of printing.
You'll hit the ceiling fast once you try anything involving curves, organic forms, or precise engineering. But for quick utility parts, I still open Tinkercad because it's just quicker than firing up a full CAD program.
Fusion 360 (Intermediate)
Fusion 360 from Autodesk is what most serious hobbyists end up using. It's free for personal use, packed with features, and has a massive community producing tutorials and support.
Parametric modeling means you can go back, tweak a dimension on any feature, and the whole model updates on its own. That's huge when you're iterating on a design and dialing in tolerances.
The learning curve is steep, expect a few weeks before it feels natural. But the payoff is worth it. Once you're comfortable in Fusion 360, you can model basically anything you can think of.
The core workflow is draw a 2D profile, then push or pull it into a 3D form. From there, add fillets, chamfers, holes, and patterns to shape the final design.
FreeCAD (Intermediate, Open Source)
FreeCAD is the fully open-source alternative to Fusion 360. It's free with zero licensing strings attached, and no company can ever yank features or change the deal on you.
The interface feels rougher compared to Fusion 360, and the tutorials aren't as polished. But the community has improved the software a lot in recent years, and it's a genuinely capable parametric modeler at this point.
If proprietary software bothers you on principle, or you'd rather not depend on Autodesk keeping the free tier around, FreeCAD is a strong option.
SolidWorks and Professional Tools
SolidWorks is the gold standard in mechanical engineering and product design. It's absurdly powerful but runs into the thousands of dollars per year for a license.
Unless you're a working engineer or a student with free access, SolidWorks is overkill for hobbyist printing. Fusion 360 covers 99% of what you'd actually need.
That said, if your job or school gives you a SolidWorks seat, absolutely take advantage of it. The skills carry over to other tools, and the feature set is phenomenal.
Project Ideas by Difficulty Level
Not sure what to print next? Here's a progression of projects that build your skills while making things you'll genuinely use. I've printed every single one of these myself.
Beginner Projects
Start here if you're brand new. These prints are forgiving, don't need supports, and teach you how your printer behaves.
Calibration cube: A simple 20mm cube for checking dimensional accuracy. Measure each axis with calipers and tweak your steps/mm if anything is off. It's tedious but necessary.
Phone stand: There are tons of free designs on Printables and Thingiverse. They're practical, quick to print, and feel like a real accomplishment for your first useful project.
Cable clips and organizers: Small, fast, and immediately useful. Stick them under your desk and finally tame that cable spaghetti.
Coasters: Simple flat prints that give you a chance to play with different layer heights and infill patterns. Try printing a set in different filament colors.
Benchy tugboat: The universal 3D printing test piece. It puts overhangs, bridging, fine details, and stringing all into one compact model. Share your Benchy online and people will pinpoint exactly what needs tuning. If you need ideas for what to try next, our list of amazing 3D printed projects might spark something.
Intermediate Projects
Once basic prints feel comfortable, these introduce multi-part assemblies, support material, and tighter dimensional tolerances.
Custom enclosure for electronics: Build a case for a Raspberry Pi, Arduino, or whatever electronics project you're working on. You'll learn how to design for specific dimensions and incorporate snap-fit joints or screw bosses.
Functional gears and mechanisms: Print-in-place gears, hinges, and linkages are a great lesson in tolerances and mechanical design. Start with a basic gear train before working up to planetary gear sets.
Lithophane photos: Convert a photograph into a thin translucent print that reveals the image when you hold it up to a light. They make incredible personalized gifts and push your skills with ultra-thin wall printing.
Replacement parts: Find something broken in your house and print a fix. Measuring the original, modeling a replacement in CAD, and printing it to fit is hands down one of the most satisfying things a 3D printer can do. It's also one of the strongest reasons to have a 3D printer at home.
Articulated animals and toys: Print-in-place articulated dragons, octopuses, and lizards are wildly popular right now. They come off the bed as one piece but flex and move when you pick them up. Perfect for testing how well your printer handles tight tolerances.
Advanced Projects
These will push both your printer and your abilities. Expect multiple print sessions, careful assembly, and probably some post-processing like sanding, painting, or epoxy finishing.
Cosplay helmets and armor: Full-size wearable helmets are multi-part prints that need precise scaling, assembly, and finishing work. Printing is just step one. Gap filling, sanding, priming, and painting are what turn rough plastic into something that looks professionally built.
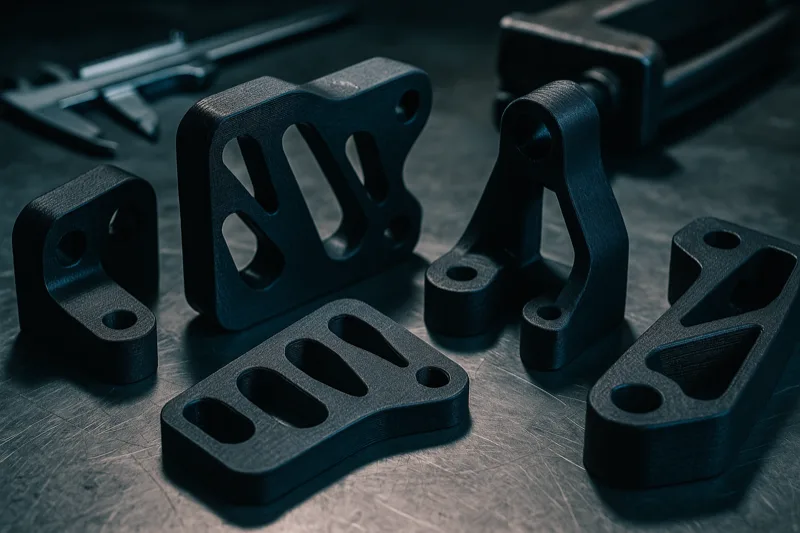
Functional tools and jigs: Custom wrenches, drill guides, soldering helpers, and workshop fixtures are incredibly satisfying to design and put to real use. PETG or ABS is the way to go for anything dealing with mechanical stress.
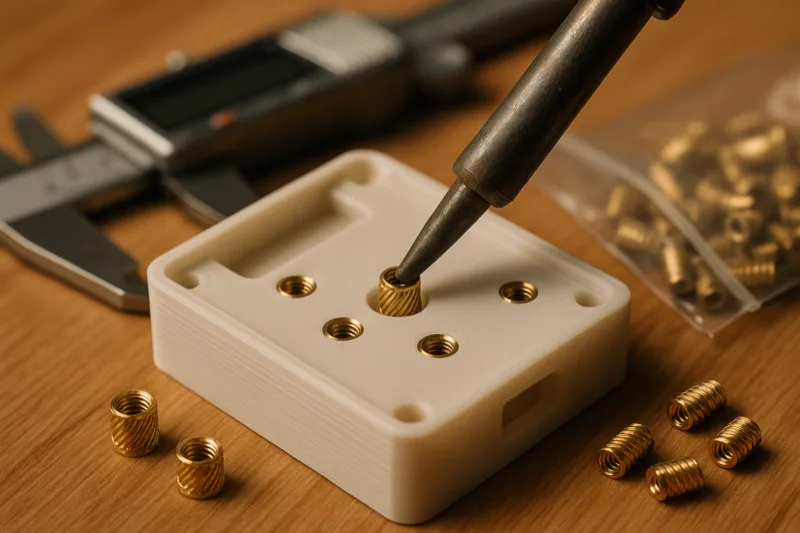
Multi-part assemblies with hardware: Design builds that use bearings, screws, magnets, and threaded inserts. This forces you to think about real engineering constraints in a way that pure plastic prints don't.
RC car or drone components: Custom frames, mounts, and body panels for remote-controlled vehicles merge 3D printing with electronics and mechanical engineering. Balancing strength against weight is a great design puzzle.
Full-scale furniture accents: Lamp shades, drawer pulls, bookends, and decorative panels printed in specialty filaments (wood fill, marble PLA) can genuinely look great in a room. These large prints test your patience and your printer's ability to stay reliable over marathon sessions.
The Struggles Every Beginner Hits (and How to Fix Them)
Bed adhesion is the number one headache for new users. You'll kick off a print, walk away, and come back to a tangled mess because the first layer didn't hold.
A clean bed and proper leveling solve this roughly 90% of the time. The remaining 10% usually comes down to a Z-offset that's too high.
Stringing is the other common one. Those thin wispy threads between sections of your print look terrible, but they typically point to retraction settings that need adjusting. A handful of test prints with tweaked retraction distance and speed will clear it up.
Warping is when corners of your print lift off the bed. It hits hardest with ABS and in rooms with moving air currents.
An enclosed printer or a simple cardboard box placed around your machine can make a huge difference. Our essential printing tricks covers solutions for all of these issues and then some.
The best piece of advice I can offer? Don't freak out when things go sideways. Every botched print teaches you something, and the community forums are packed with people who've already solved whatever you're dealing with.
Safety Guide for 3D Printing
3D printing is safe overall, but there are legitimate hazards worth knowing about. I've watched too many hobbyists blow these off and pay for it later.
Fumes and Ventilation
PLA is the safest material to print. It gives off minimal fumes and is generally considered non-toxic, though any melted plastic releases ultrafine particles you'd prefer not to inhale.
ABS is a whole different situation. It puts out styrene fumes that cause headaches and irritation, and they're not something you want to breathe over time. Printing ABS regularly means you need a well-ventilated room or an enclosed printer with a carbon filter exhaust.
PETG lands somewhere in the middle. It's far less pungent than ABS but still gives off some fumes at higher temps. Decent room ventilation handles it fine for occasional use.
ASA, polycarbonate, and nylon all produce fumes you should not be breathing. A filtered enclosure or venting to the outside is mandatory for regular use with these materials.
Resin Handling Safety
Resin printing demands way more safety awareness than FDM. Uncured resin irritates skin and acts as a sensitizer, meaning repeated exposure can trigger a permanent allergic reaction.
Wear nitrile gloves every time you handle uncured resin or prints that haven't been fully post-cured. Latex gloves won't cut it. Resin soaks right through them.
Safety glasses are non-negotiable. Resin splashes happen, and getting uncured resin in your eyes is a trip to the emergency room.
Work with good ventilation and never pour resin down a drain. Cure waste resin in sunlight before throwing it away as solid waste. Keep your resin workspace completely separate from anywhere you prepare food.
Fire Prevention
3D printers are essentially heating elements attached to motion systems that run unattended for hours. Fire risk is low, but it's real.
Thermal runaway protection needs to be active in your firmware. This kills the heaters if the temperature sensor reads something unexpected. Most current printers include this, but some older budget machines may not.
Never run a printer on a surface that could melt or ignite. A concrete paver, metal table, or fireproof mat underneath your printer is cheap peace of mind.
Put a smoke detector near your printing area. For overnight or unattended prints, a smart smoke detector with phone alerts adds another layer of protection.
Check your wiring periodically, especially on printers you've modified. Loose connections at the heated bed, hotend, or power supply are the most common ignition points. Any wire that feels warm to the touch during a print needs attention right away.
Child Safety
3D printers are fantastic learning tools for kids, but supervision is a must. Hot nozzles reach 200C or more, and moving parts can catch small fingers.
Set a firm "look but don't touch while it's running" rule. Kids can handle finished prints, help with designs in Tinkercad, and remove completed parts once the bed has cooled.
Store filament and especially resin where young children can't get to them. Small filament scraps are choking hazards, and resin is outright toxic.
Things I Wish Someone Had Told Me Earlier
Bargain-bin filament ends up costing you more over time. I spent my first year grabbing the cheapest spools available, and the mountain of wasted prints from inconsistent diameter and moisture problems ate through any savings fast.
Invest in decent filament from the start. Hatchbox, Polymaker, eSun, and Inland all deliver reliable results without being expensive.
Keep your filament in sealed containers with silica gel packets. Moisture quietly destroys print quality, especially with PETG and nylon. I learned that one the hard way after ruining several spools.
Level your bed more frequently than feels necessary. Temperature swings, vibration, and regular use knock it out of alignment constantly. Some of the best 3D printing tricks are simple habits like this that head off problems before they happen.
Run your printer slower than whatever the defaults suggest. Yes, prints take longer. But quality improves dramatically and you'll waste far less filament on failed jobs.
One more thing: grab a decent pair of flush cutters and a proper scraper. The tools bundled with most printers are junk. Spending $10 on better hand tools makes cleanup and post-processing so much faster.
What Can You Actually Make With a 3D Printer?
This is where it gets really fun. The practical uses stretch way past little figurines and test cubes.
Home repair is probably my favorite application. Broken knob on the dryer? Print a replacement. Missing bracket for a shelf? Model one up and print it in an hour.
I've saved hundreds of dollars printing replacement parts for appliances, furniture, and random household items that would've meant buying something entirely new. There are legitimate reasons to own a 3D printer at home, and this sits right at the top.
Custom gifts are always a hit. Personalized phone stands, lithophane photos, custom cookie cutters, and name plates for kids' rooms. People are genuinely surprised when you hand them something you made yourself.
The cosplay scene has adopted 3D printing in a huge way. Full armor sets, helmets, props, and weapons that once required months of manual work can now be printed and assembled in a fraction of the time.
For education, it changes everything. Kids who struggle with abstract math or science concepts suddenly get it when they can hold a physical model of a molecule, a gear system, or a topographic map in their hands.
Prototyping is how this whole industry started, and it remains one of the strongest use cases. If you have a product concept, you can be holding a physical version of it the same day instead of waiting weeks for a manufacturer to send a sample.
The Community Makes All the Difference
Honestly, one of the best things about picking up 3D printing is the community that comes with it. The subreddits, Discord servers, and forums are full of people who actually enjoy helping newcomers.
Thingiverse and Printables are two enormous libraries of free models ready to download and print right away. You don't need any design skills to start making cool stuff.
YouTube is another treasure trove. Channels focused on 3D printing put out troubleshooting walkthroughs, printer reviews, and project breakdowns all the time. Whenever I get stuck on a specific problem, a quick YouTube search usually gets me past it in minutes.
If you're still weighing whether to jump in, reading about why a 3D printer is worth having at home might tip the scales.
Where Is 3D Printing Technology Headed?
Printers keep getting dramatically better and cheaper each year. Machines that ran $2,000 five years ago have been surpassed by $300 printers today. The entry barrier has essentially disappeared.
Multi-material and multi-color printing is going mainstream. Printing in more than one color used to require a $5,000 setup, but now printers under $500 handle it.
Resin printing has gotten both safer and more approachable. The detail quality from affordable resin machines is jaw-dropping, particularly for miniatures, jewelry, and dental work.
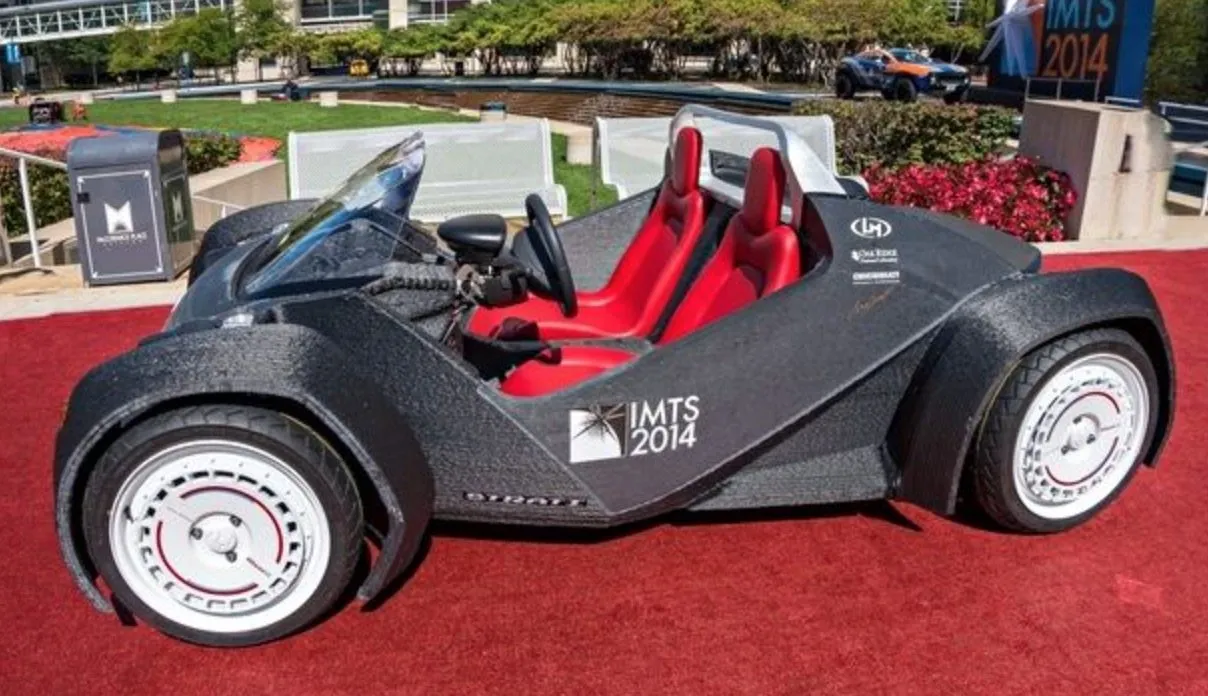
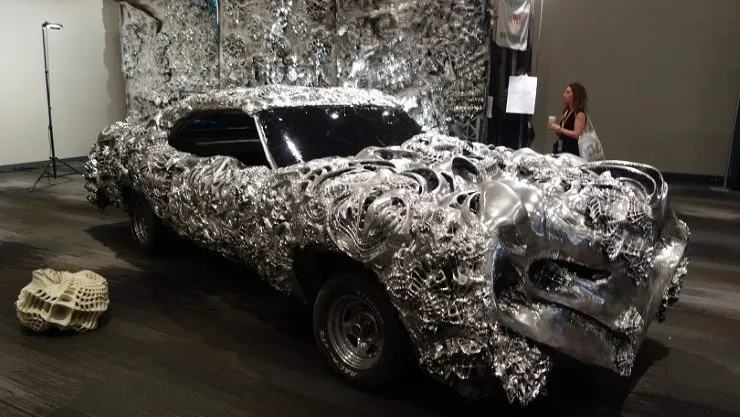
The bigger picture is even wilder. 3D printed houses are going up right now. Medical implants, prosthetics, and even organ scaffolding are actively being developed. NASA prints tools aboard the space station. What's happening today reads like science fiction, and you can check out some of the most amazing 3D printed creations to see what I mean.
Is 3D Printing Right for You?
If you like making things, solving problems, or just want a hobby that produces something you can hold, then yeah. It probably is.
You don't need an engineering background or any particular technical skills. You need patience, a willingness to learn through trial and error, and somewhere around $200 to $400 for a capable beginner printer.
The people who get the most out of 3D printing are the ones who look at a broken thing and think "I could make a new one" instead of heading to the store. If that sounds like you, start with our complete beginner's guide and take it from there.
You don't have to go big right away. Pick up a budget-friendly printer, download some free models, and see if it clicks. For most people, once that first real project comes off the bed looking good, they're hooked.
 guide
guide