
Our Ultimaker Original 3D Printer had been our daily driver since 2012, and it earned that spot. But two things kept frustrating us.
No heated bed meant ABS and nylon were basically off the table. And the bowden extruder? Forget about flexible filaments.
We test a ton of different materials, so we needed an upgrade. Specifically: heated bed, direct drive extruder. Those were the non-negotiables.
The CraftBot checked both boxes, plus it brought a massive build volume to the table. For a mid-range machine, we expected a lot — and the CraftBot 3D Printer delivered from the first print. Here’s the full breakdown.
Overview
Photo Gallery


Key Specifications
| Spec | Detail |
|---|---|
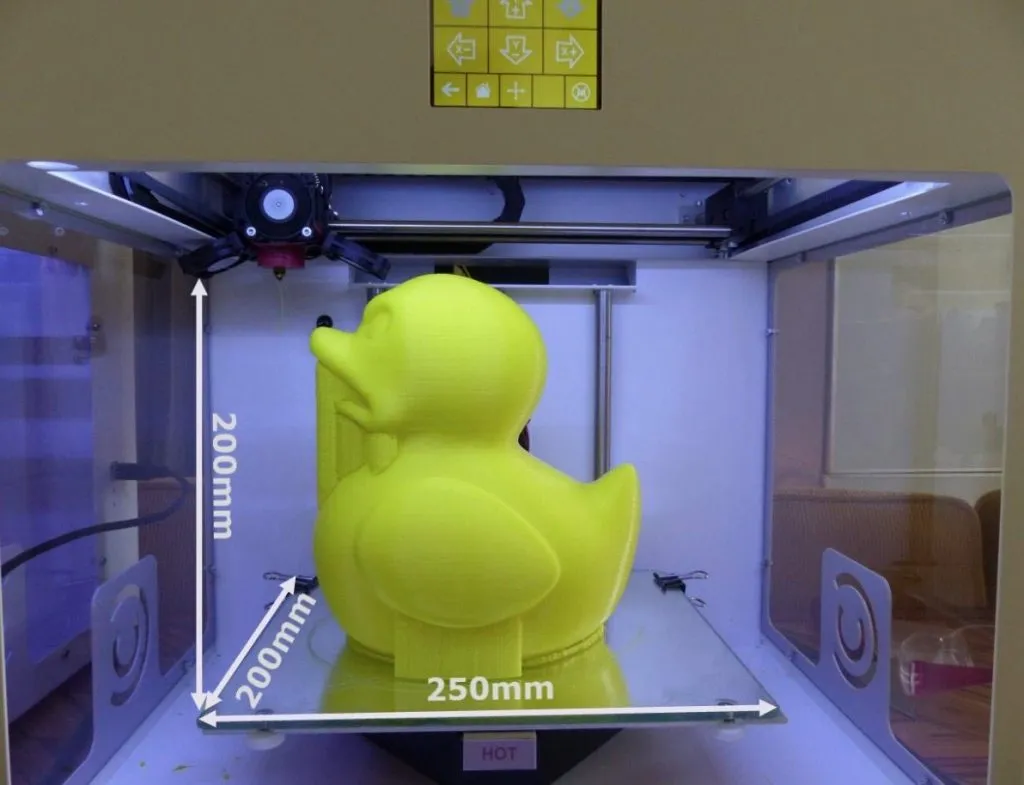
| Build Volume | 10,000 cubic cm (40 x 36 x 37 cm) |
| Extruder | Direct drive with dual cooling fans |
| Filament Type | PLA, ABS (1.75mm) |
| Heated Bed | Yes, rated 100°C (practical max ~80°C) |
| Display | LCD touchscreen |
| Connectivity | USB |
| Frame | Mostly metal |
| Weight | 14 kg |
| Price Range | Mid-range |
The Founders of the CraftBot - CraftUnique
CraftUnique is based out of Budapest, Hungary, and they’re the team behind the CraftBot. Their background is in electronics — 3D printing is a relatively recent move for them.
They launched a crowdfunding campaign aiming for $40,000 USD. They ended up pulling in $245,000.
The pitch was ambitious: take the best features from the top printers on the market and roll them into a single machine. Not just another me-too printer.
From what I’ve seen after extensive testing, they actually pulled it off. And they haven’t stopped iterating since.
Who Should Purchase A CraftBot?
Look, the CraftBot isn’t cheap. It sits in the mid-range tier, and I get the temptation to save a few hundred bucks and grab something more budget-friendly.
But I’d think twice before going with some no-name printer you’ve never heard of. Durability matters in 3D printing. A lot. If you’re on a tighter budget, the Monoprice Maker Select is a proven pick that won’t leave you guessing.
The price tag held me back for a while too, honestly. What finally convinced me was adding it all up: sturdy build, heated bed, massive build volume, direct drive extruder, and genuinely capable software. When you look at the whole package, the value is actually there.
My unit shipped straight from CraftUnique and showed up a couple days late. They emailed me an apology before I even had a chance to complain. That kind of attentiveness tells me they’re paying attention to their customers.
Specifications
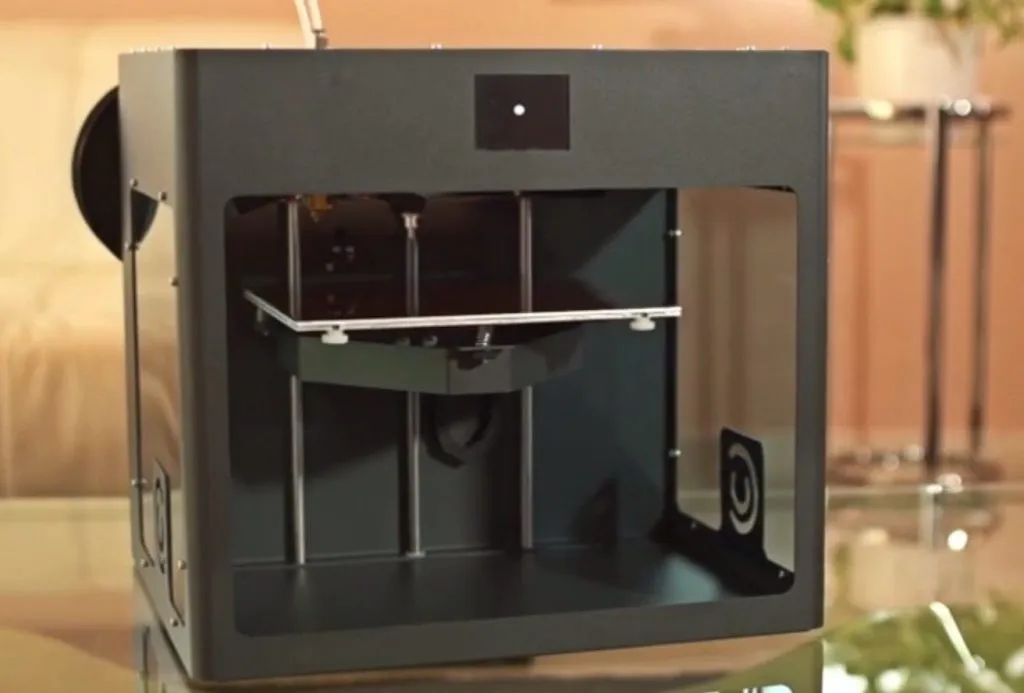
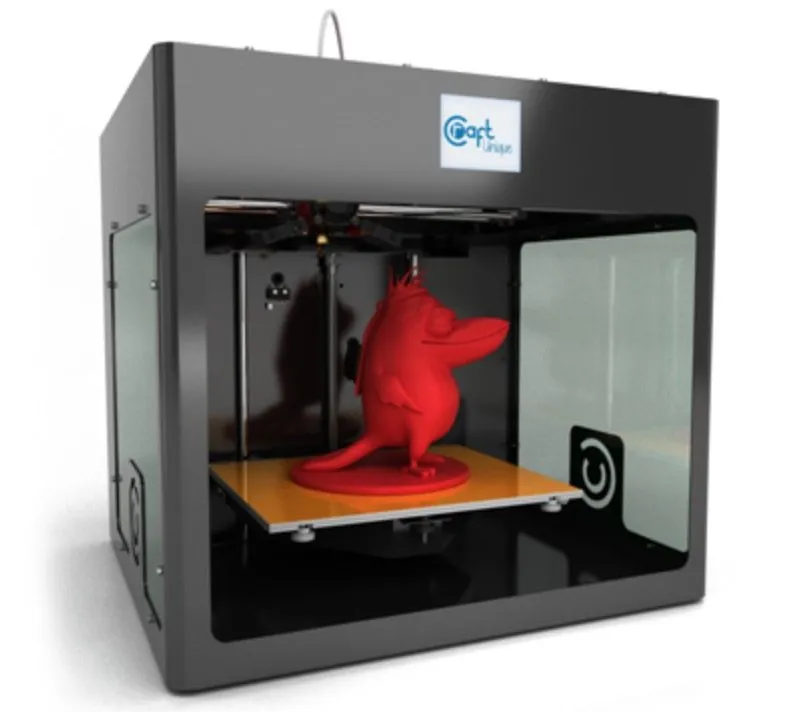
The CraftBot 3D Printer is a three-axis FFF machine, and it’s a beefy one. At 40 x 36 x 37 cm, the thing commands serious desk space, but that size gives you 10,000 cubic centimeters of build volume. That’s among the largest you’ll find in this class.
The mostly-metal frame makes it feel substantial. 14 kg of solid construction.
It’s not fully enclosed — the top and front are open. But the side windows do a good job blocking drafts that could mess with bed temperature during a print. If you need a totally sealed chamber, the CEL Robox locks down completely and even prevents the door from opening mid-print.
Those side windows are actually great for watching your print take shape. Turn on the white LED light and the interior looks fantastic.
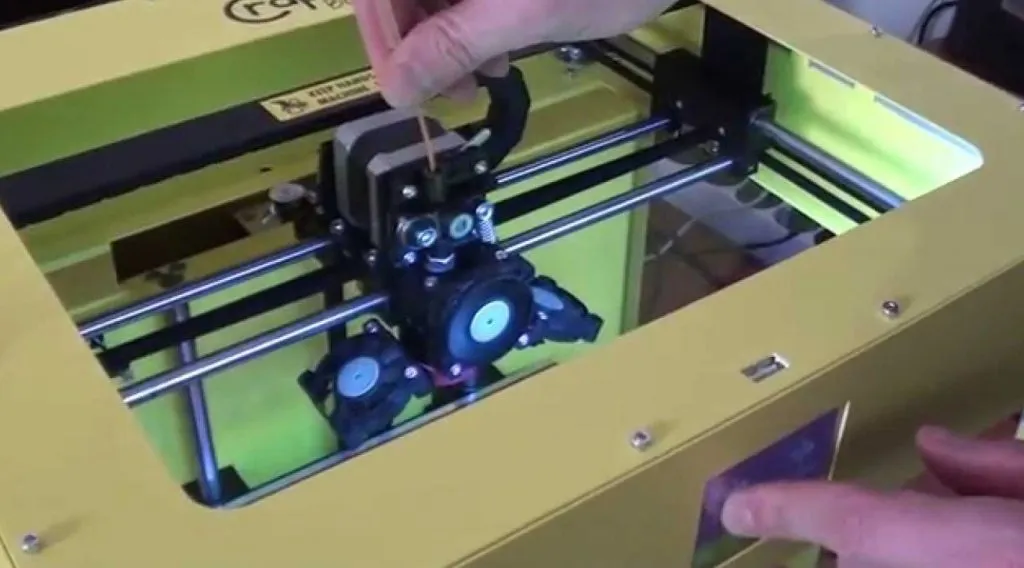
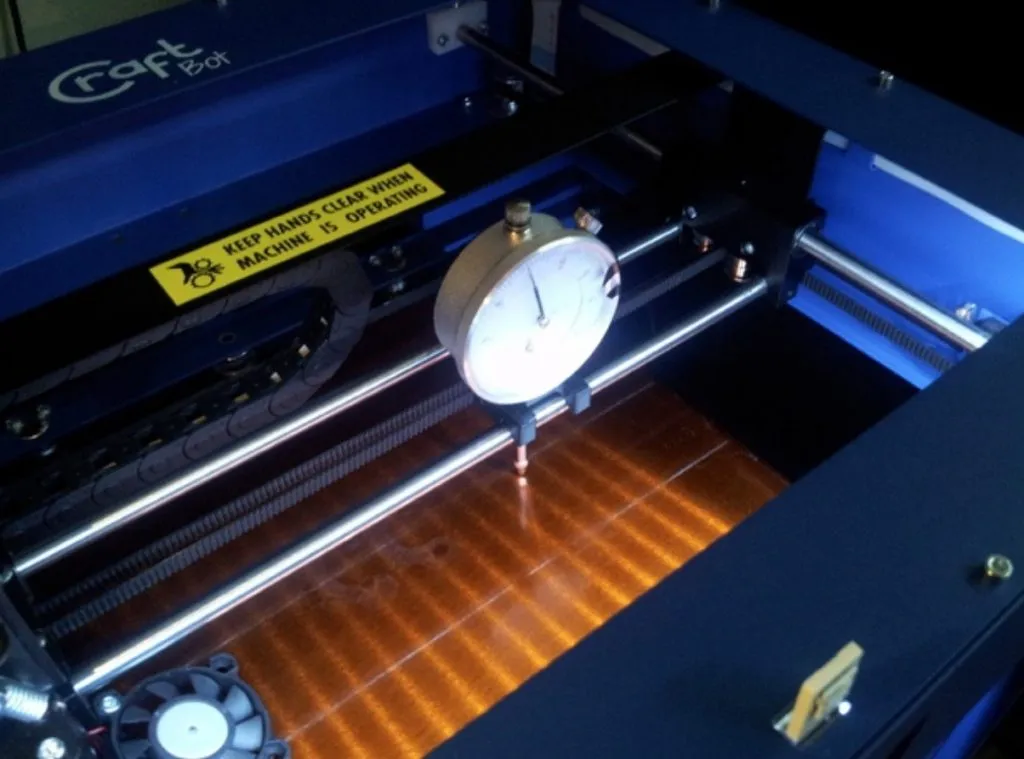
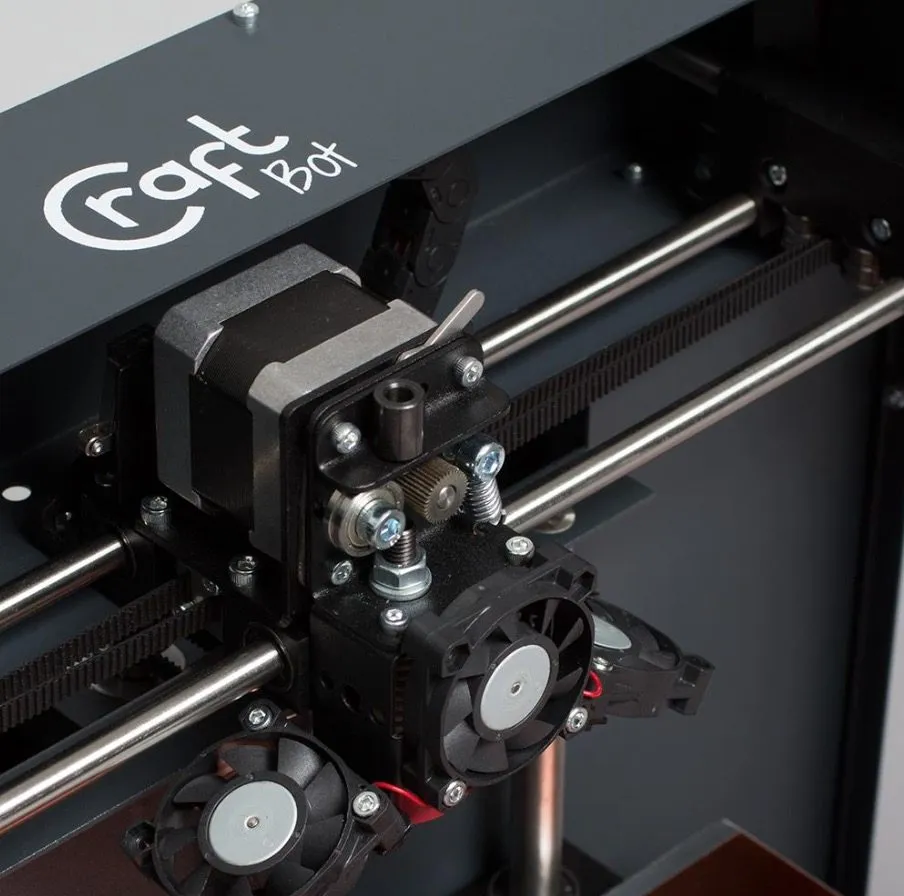
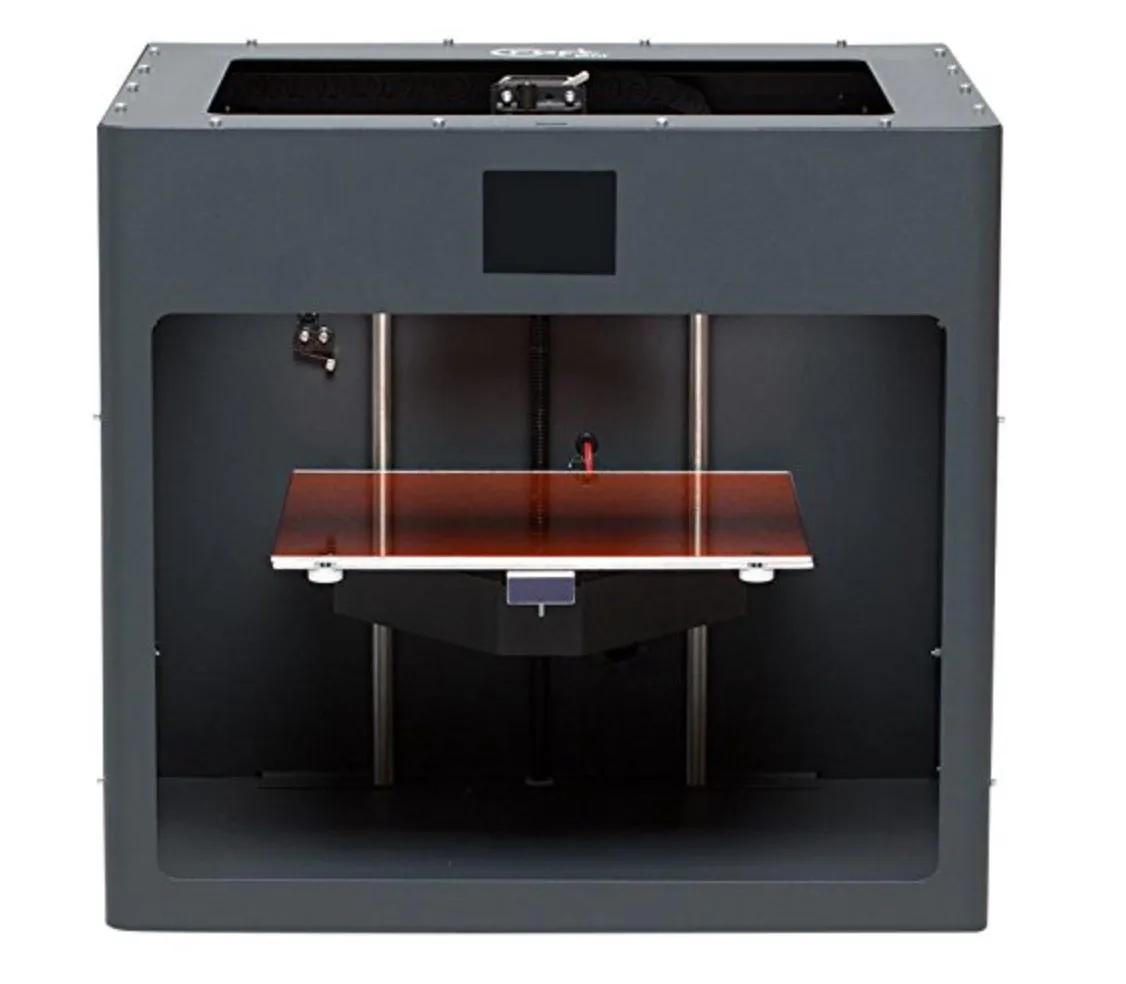
The direct drive extruder uses dual cooling fans and handles both PLA and ABS at 1.75 mm. The heated bed pops right out by hand, and there’s an LCD touchscreen up front for on-board controls. USB port too, so you can print untethered when you need your computer for other things.
Setting Up The CraftBot
It arrived in a sturdy cardboard box packed with foam on all sides. Exactly what you want to see with a mid-range piece of equipment.
I’ve learned over the years that good packaging usually means the manufacturer cares about quality across the board. My unit showed up pristine — not a single ding. That’s not always the case with 3D printers, trust me.
Inside the box: spool holder, guided tube, 5 hex wrenches, USB cable, power cable, USB flash drive, spacer cards, and a spool of ABS filament. The Quickstarter guide was right on top, and I actually read through the whole thing before powering anything up.
The manual surprised me. It’s well-illustrated and doesn’t skip steps. Every detail is covered. The MakerBot Replicator 2 has a similarly thorough setup guide, and both manuals set a high bar for the industry.
Setup is straightforward. Install the filament tube holder onto the frame, thread the tube through, and connect it to the extruder. Then mount the spool holder — loosen a hex nut, slide it in, tighten back down.
Plug in the USB, flip the power switch. Fair warning: the power cable is short. Just grab an extension cord and you’re fine.
That first power-on moment? Pretty great. The LED interior lit up, the touchscreen came alive, and the whole machine just looked like it meant business.
Before you print anything, though, update the firmware. You’ll need to install CraftWare and CraftPrint first. CraftPrint handles both printing and firmware management. Some folks report the LCD going blank during the update — don’t panic. Close the software, restart the printer, and it should come back with the update already applied.
Leveling The Build Platform
With the firmware sorted, it’s leveling time. The CraftBot uses a three-point system with thumbscrews under the bed to dial in the nozzle gap.
The LCD walks you through it step by step, and the extruder automatically moves to each calibration point. My tip: use a card roughly 0.3 mm thick to gauge the nozzle distance. Once you’ve dialed in all three points, the printer runs through the whole sequence again to double-check everything. Nice touch.
Loading The Print Filament
Next up: loading filament. Mount the spool, thread one end through the guide tube, and push it into the top of the pre-heated extruder.
I appreciate how the CraftBot lets you know it’s loaded. There’s a switch inside the extruder that clicks once the filament seats properly, and the machine pinches it between a pulley and bolt to hold tension. You know it’s locked in. The LCD even has a reverse command for pushing filament back out when you want to swap spools.
All told, you should be printing within about an hour from unboxing. It’s a genuinely smooth setup.
Two small gripes with the manual, though. It doesn’t explain how to remove and reinstall the print bed. Not hard to figure out on your own, but why leave it out?
It’s also vague about the bed surface material. If you’ve been around 3D printers, you’ll recognize it as a Kapton sheet. It’ll wear out eventually, and the manual says nothing about replacing it. Plenty of tutorials online, but still.
All About the Software and Slicer
CraftUnique doesn’t just build the CraftBot Printer — they also develop their own free slicer called CraftWare. I ran it on a PC with Windows 7.
I’ll be upfront: my first experience with CraftWare was terrible. It froze my entire computer on launch. Multiple restarts. Reinstalling didn’t help, and even their support team couldn’t figure it out.
I pivoted to Repeater Host as a workaround and started getting good prints through that. It controlled the printer just fine. Then a few weeks later, CraftUnique dropped the CraftWare 1.10 beta, and it actually worked. If you’re reading this now, you probably won’t hit the same issue. But if you do, just know that third-party slicers work as a fallback.
Once CraftWare cooperated, I was genuinely impressed. It handles all the basics — rotating, duplicating, scaling models — but the real strength is in its two slicing modes: easy and expert.
Brand new to 3D printing? Stick with easy mode. Pick your filament, set quality, decide on rafts and supports. Done. The FlashForge Finder takes a similar beginner-first approach if that’s what you’re after.
Save expert mode for later. You’ll know when you’re ready.
My favorite feature, by far, is the live preview. Change a setting and you instantly see how it affects the model. Zero guesswork.
Expert mode unlocks over 50 settings, which is a staggering amount of control. Hover over anything you don’t recognize and a hint window pops up with an explanation. Though honestly, the visual preview usually tells me everything I need to know faster than reading descriptions.
The G-code visualization is where CraftWare really flexes. It color-codes everything — outer loops, rafts, infills, shells — and the level of detail is beyond any other slicer I’ve used. You can see exactly what’s going to happen before a single gram of filament gets extruded.
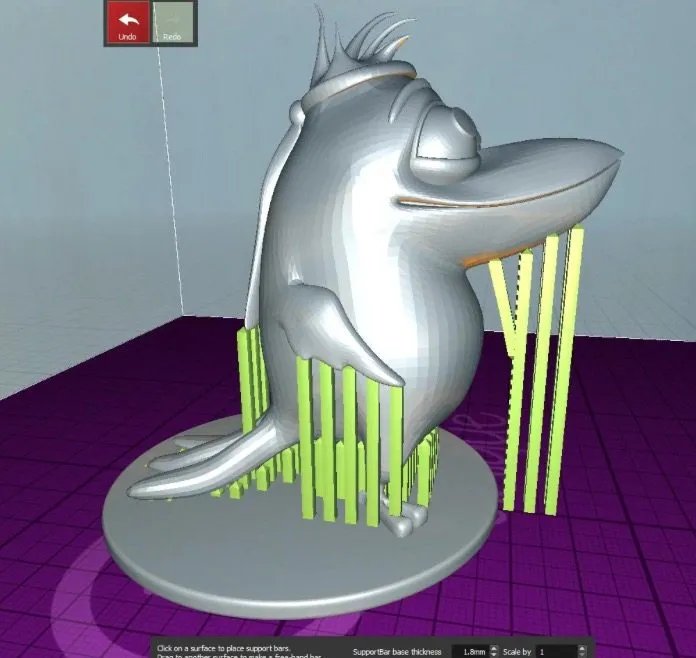
Support placement deserves a mention too. Auto-generate them (great for beginners) or place each one manually if you want total control. That kind of flexibility is why CraftWare works for both newcomers and veterans.
Bottom line: you know what your print will look like before it starts. That saves filament, saves time, and means way fewer wasted prints.
My First Prints With The CraftBot
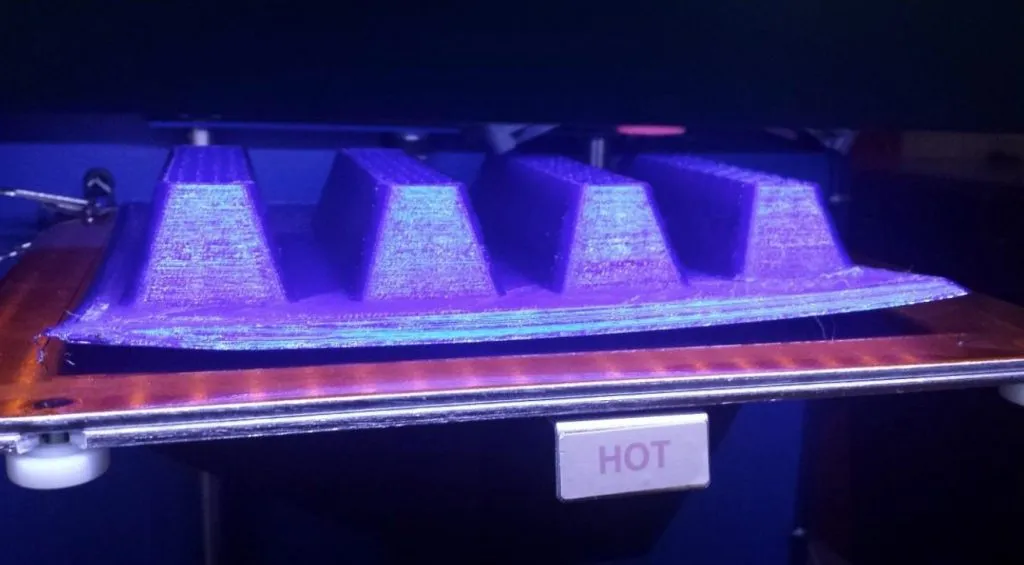
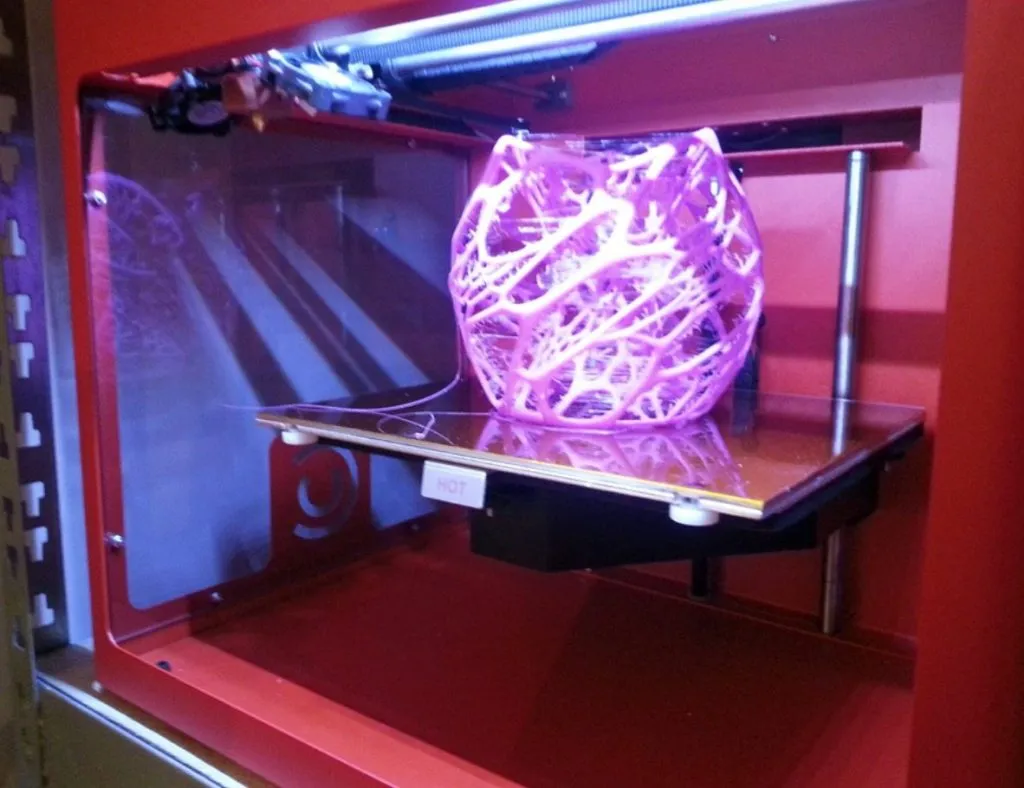
A few things caught my eye once I started actually printing. When the build platform heats up, a little metal block underneath flips to show the word “HOT.” Simple, but clever. Especially if there are kids nearby.
The removable bed is one of those features you don’t think about until you need it. Pull it out, prep the surface, attach a new sheet — all without fighting around the printer frame.
Removing finished prints? Same deal. If something’s really stuck, just pop the whole bed out and use a spatula on a flat surface. So much easier than prying at it while it’s still mounted.
Print Quality
Alright, the part that actually matters — how does it print? Every test used PLA filament at 40 mm/s with 0.2 mm layer resolution.
Dimensional Accuracy
This one measures backlash. The test prints six stacked discs, each smaller than the one below it. You measure the second disc, which should come out at exactly 20 mm in diameter.
Our CraftBot deviated by 0.2 mm or less. Good, not perfect. I’d call it 4 out of 5 stars. The Afinia H480 landed in a similar range during our testing.
Bridging Performance
Can it span open gaps without supports? We tested 4 distances, from 20 to 60 mm. Only the slightest drip on each bridge. The CraftBot handled this well. 4 out of 5 stars.
Overhang Performance
We pushed 4 angles from 30 to 70 degrees to see where things fall apart. Everything held together beautifully until 70 degrees, where loops started drooping. The rest looked sharp.
3.5 out of 5 stars.
Fine Positive Space Features Performance
This brutal retraction test prints spirals that taper thinner as they climb. The strands themselves came out clean, but little filament hairs were hanging off each one.
Honestly, most printers struggle here. 3 out of 5 stars — and those stray hairs pluck right off with tweezers anyway.
Empty Space Tolerance
How well does it handle holes and interlocking parts? We printed a Lego-style block with 5 pins that should slot into matching holes.
Four of five pins came out clean. The fifth — the 0.2 mm one — was stuck. Everything else fit perfectly. 4 out of 5 stars.
Resonance Testing
We checked for vibration artifacts in both the x-y plane and along the z-axis. Hard to measure precisely, so we went pass/fail.
X-Y: a 3D wall model showed zero filament ripping at corners. Pass.
Z-axis: our test block was totally uniform top to bottom. Pass.
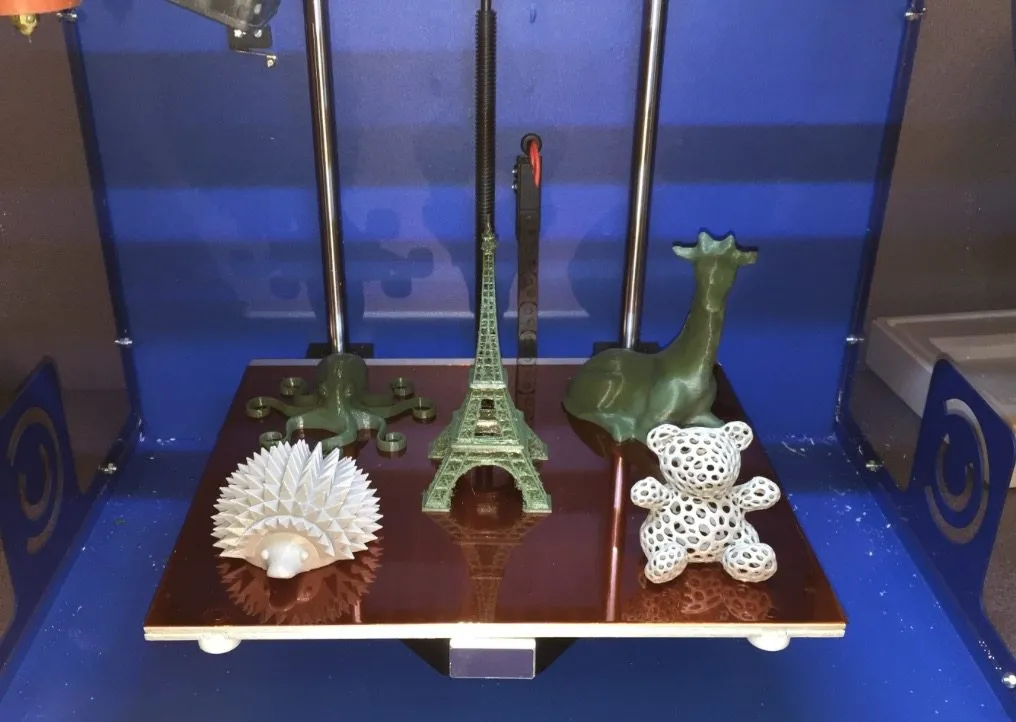
Model Testing
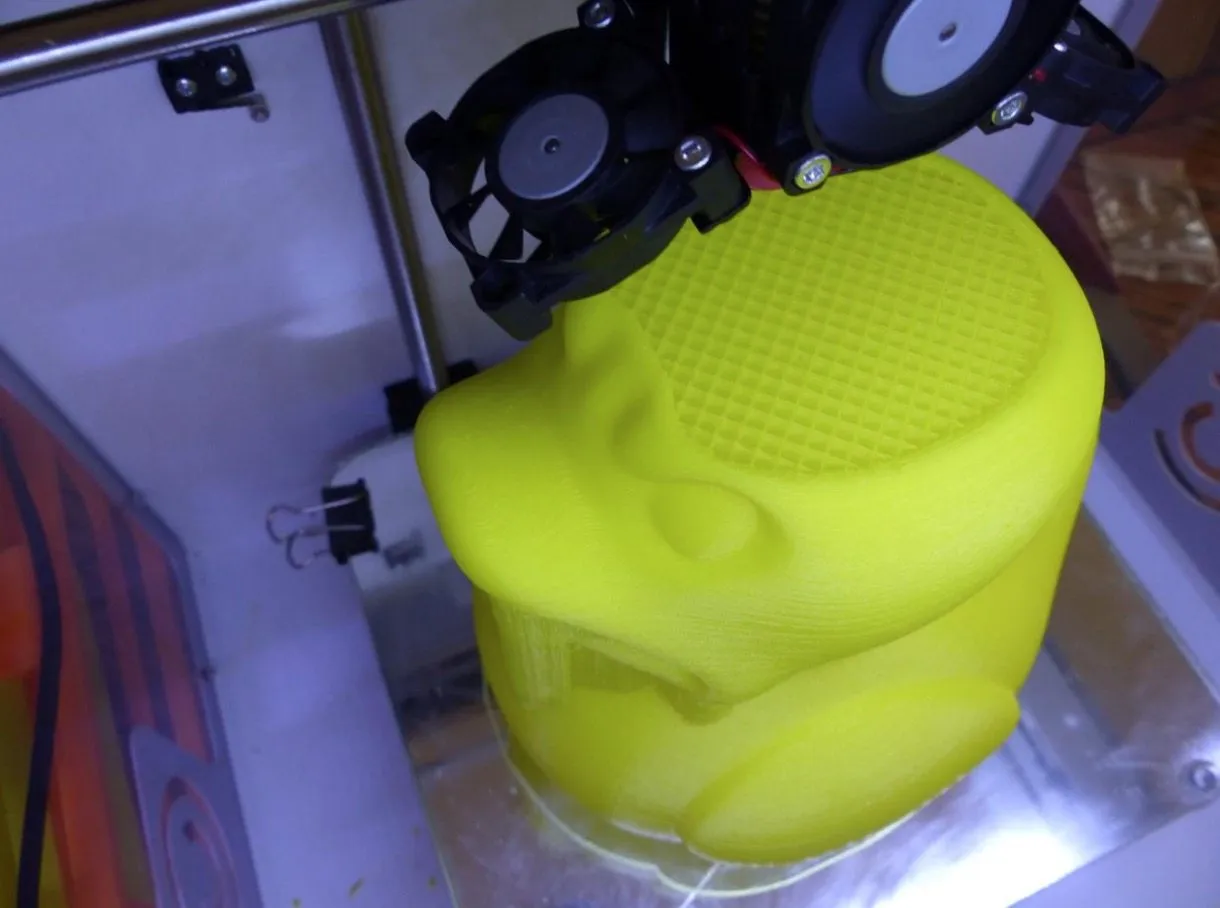
For the real-world test, we picked a robot design that wasn’t pre-loaded in the software. That matters — you want to see how the printer handles a random file, not one that’s been optimized for it.
The robot came out great. Smooth surfaces all around, with only minor blemishes visible under close inspection. Some filament dripping at the intentional small holes, but tweezers sorted that out in seconds.
Curvature was nearly flawless. Surface ridges exactly as designed. We averaged it out to 4 out of 5 across all categories, and a bunch of other objects printed just as well. All done with PLA tape.
Then came ABS. This is where things went sideways.
ABS is always trickier because it bonds aggressively to the bed and warps easily. We figured the heated bed rated for 100 degrees Celsius would handle it.
It didn’t. I couldn’t push the bed past 80 degrees. Turns out this is a known limitation across CraftBot units — the power supply simply can’t sustain that temperature. Without enough heat, my ABS prints kept peeling off and failing. Really disappointing. The FlashForge Creator X handles ABS far more reliably with its enclosed build chamber.
I refused to give up, so I experimented. BuildTak plus a coat of hairspray turned out to be a workable hack. Adds some prep time and it’s a little annoying, but the prints stuck. Until CraftBot upgrades the power supply, though, PLA is your best bet with this machine.
HIPS Filament
After the ABS frustration, I decided to try high impact polystyrene (HIPS). Most people know it as support material, but it actually produces surprisingly solid prints on its own.
The finished pieces felt smooth and held up well. I was relieved the CraftBot ran HIPS without any drama. The LulzBot TAZ 5 also handles HIPS beautifully and even recommends it as a primary printing material.
One hiccup: I got cracking early on. Bumping the extruder past 220 degrees Celsius fixed it completely. So if you see cracks or warping with HIPS, just creep the temperature up until things smooth out.


