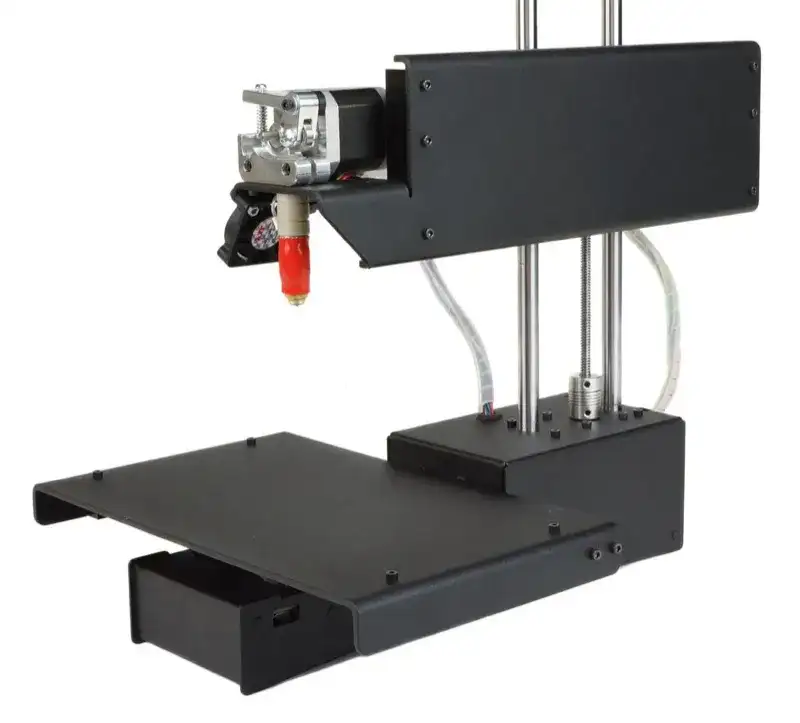
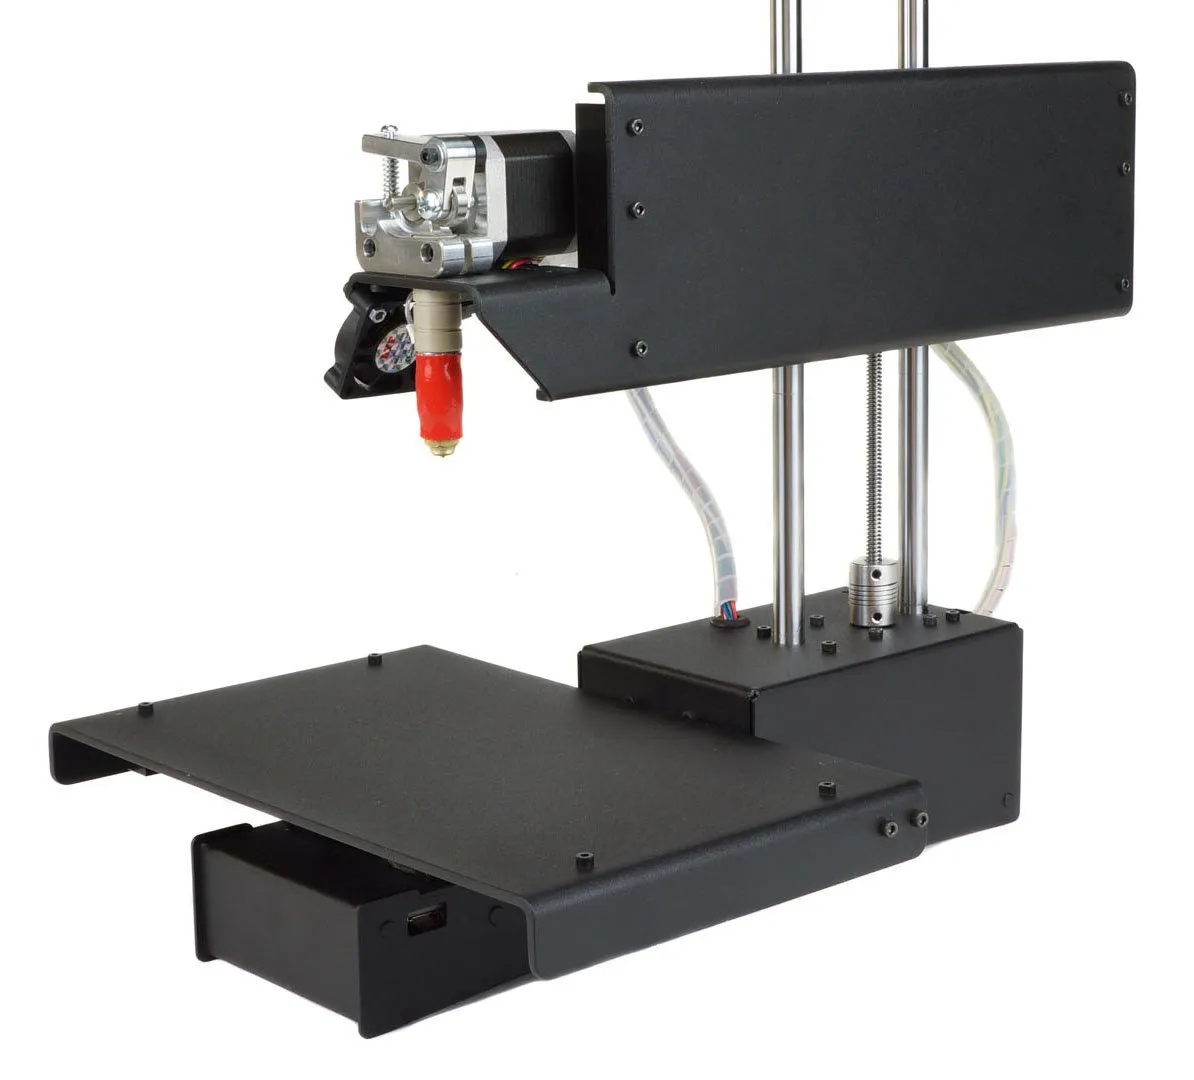
This is the Printrbot Simple Pro (model 1608), the newest addition to Printrbot’s “Simple” line. It sits right in the middle of their 3D printer range.
Specifications

Printrbot Simple Pro
A mid-range workhorse with WiFi, LCD touchscreen, auto-leveling, and 50-micron resolution wrapped in a sturdy powder coated steel body.
Pros
- Excellent print quality for functional parts
- WiFi and cloud-based workflow
- Very sturdy powder coated steel construction
Cons
- Cloud printing does not support heated bed yet
- Z-axis tower rails are also load bearing
Printrbot builds FFM (fused filament manufacturing) printers exclusively. It’s the most common printer type for hobbyists and small businesses.
FFM printers work by feeding filament from a spool, heating it through an extruder, and depositing it layer by layer through a precision nozzle. The X, Y, and Z axes control exactly where the material goes.
This printer runs 1.75mm filament and ships with PLA as the default. There’s a sample spool included in the box.
I haven’t experimented with other materials yet, but it should handle PLA blends, ABS, wood filament, and even flexible rubber-like stuff. The TEVO Nereus supports a similar filament range including HIPS and wood at a lower price.
Build volume tops out at 8” wide (X axis) x 6” deep (Y axis) x 8” tall (Z axis). That’s 384 cubic inches total. Solid mid-range territory.
Resolution on a 3D printer works a lot like pixels on a screen. It dictates the smallest and largest detail each print can achieve.
A few things factor in: extruder precision on the X plane, surface smoothness, nozzle tip size, and Y/Z axis accuracy.
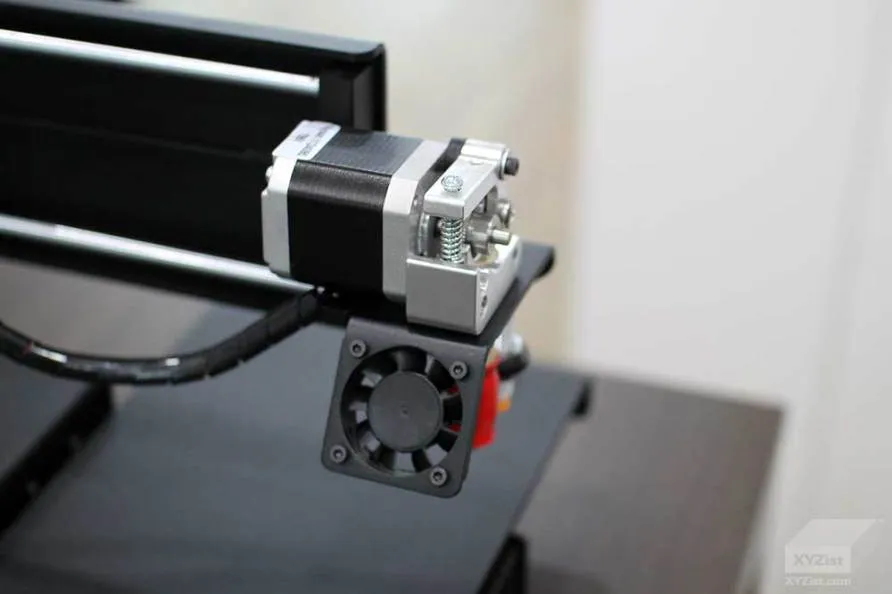
The Simple Pro uses an aluminum extruder with a Ubis 13S hot end. It accepts 1.75mm filament and outputs at 0.3mm from the nozzle.
Printrbot claims 50-micron resolution. After running several test prints, I’d say that number holds up. I’ve used printers that top out at 200 microns while costing substantially more and printing slower. Getting 50-micron quality at this price point is genuinely impressive.
Photo Gallery
Key Specifications
| Spec | Detail |
|---|---|
| Build Volume | 8 x 6 x 8 in (384 cubic inches) |
| Resolution | 50 microns |
| Nozzle Output | 0.3mm |
| Filament | 1.75mm PLA (ABS, wood, flexible compatible) |
| Connectivity | WiFi, USB |
| Display | LCD touchscreen |
| Auto-Leveling | Yes, 3-point probe |
| Frame | Powder coated steel, CNC aluminum |
| Print Speed | ~100mm/s |
| Heated Bed | Optional upgrade |
Print Speed
Print speed is tied directly to resolution, which you can adjust per print. It’s also hard to benchmark since every model has different dimensions and volume.
Printrbot still lists speed as TBA on their site, but other users have clocked it at roughly 100mm/s of filament throughput.
My mid-size test prints all ran over 12 hours. One pushed close to 20 hours. The XYZ Da Vinci 1.0 handles those long runs reliably too, and I’ve logged hundreds of hours on it without a single failure.
If you’re new to 3D printing, those numbers might sound painful. But that’s actually standard for this class of printer.
The tradeoff is straightforward: print faster, get lower quality. Print slower, get better quality. Either way, making your own part is usually still quicker than ordering one online and waiting for shipping.
Auto-Leveling Feature
The Printrbot Simple Pro has auto-leveling probes and software that handle Z axis calibration for you. It truly earns the “Simple” name here.
Even being a fraction of a degree off-level can make filament lean or slide to one side, which throws off your entire print.
Beds also drift over time with normal use. Without periodic leveling, quality gradually deteriorates and you end up chasing problems that don’t seem to have an obvious cause.
Auto-leveling eliminates all of that by recalibrating before every single print. It sounds like a minor feature until you’ve experienced the alternative. The time and frustration it saves is substantial.
The process is dead simple. Tap print on the LCD touchscreen, the extruder centers itself and heats up.
Then the head probes the bed at three points (three points define a plane in 3D space) and lays down a quick test line near the edge before starting your actual model.
Material
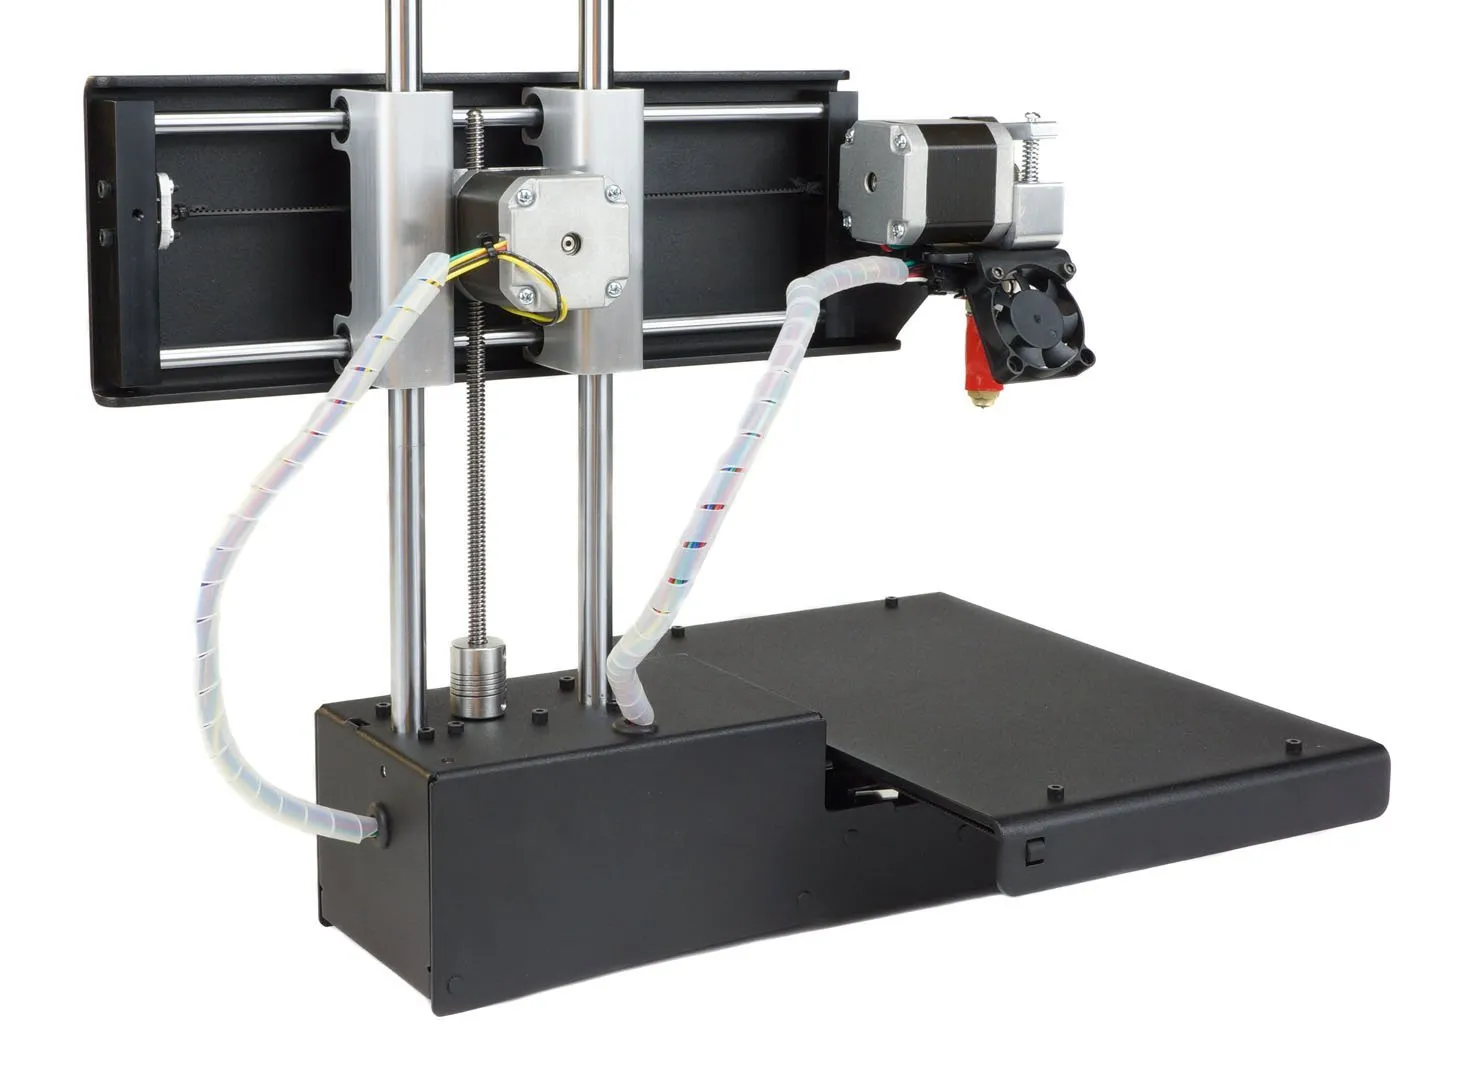
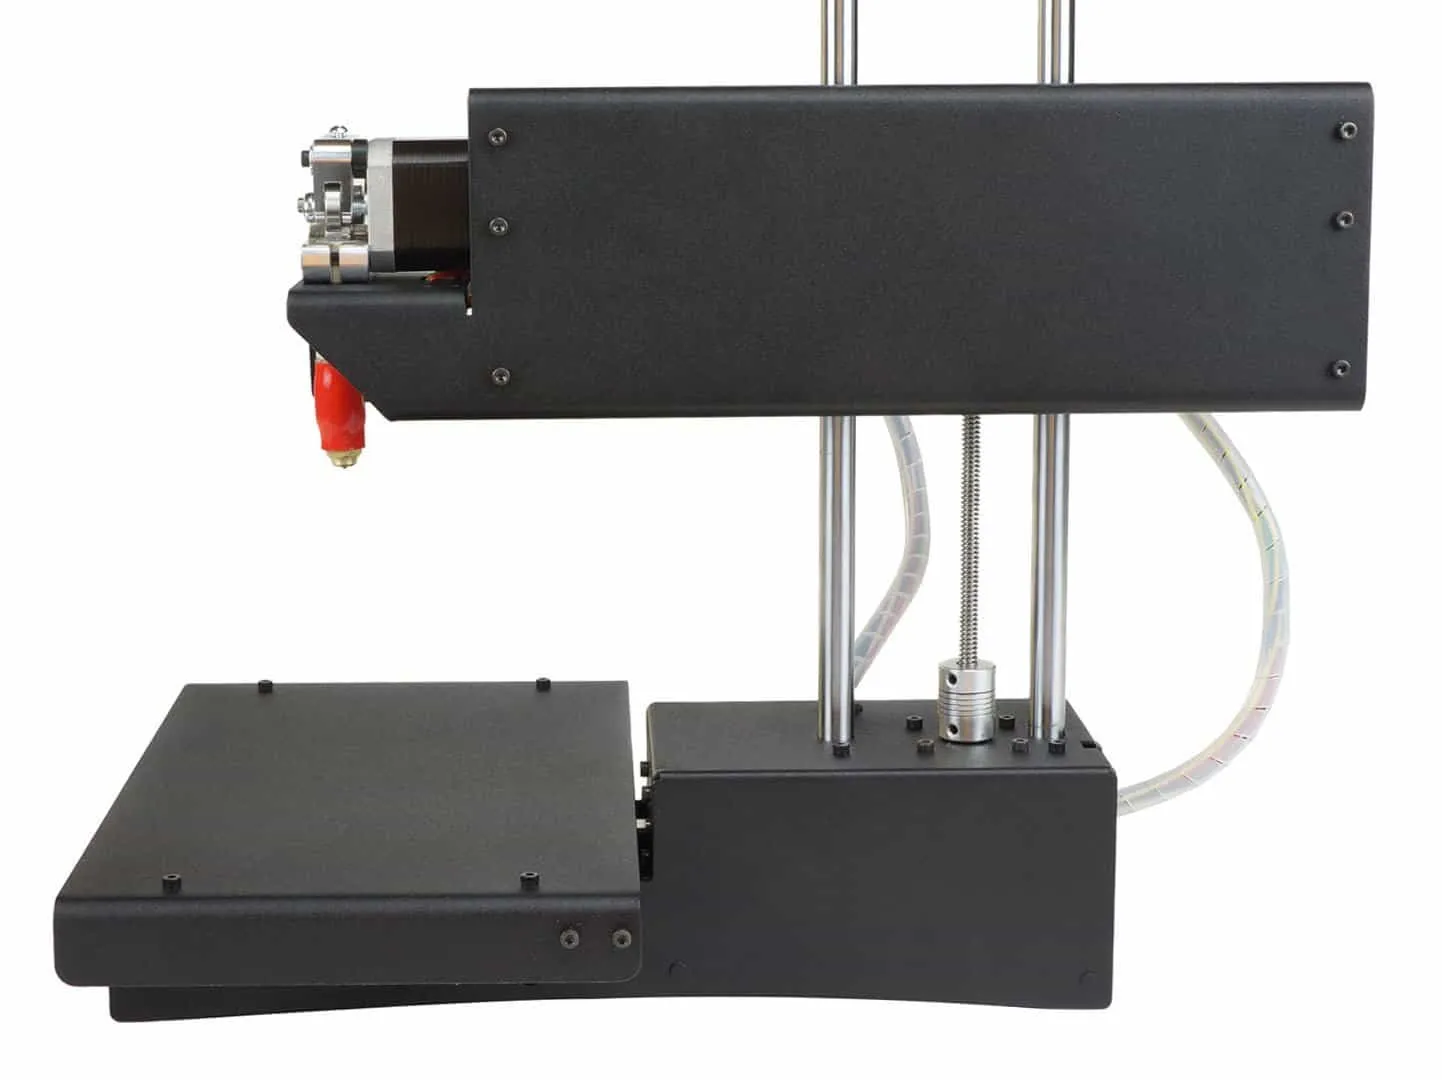
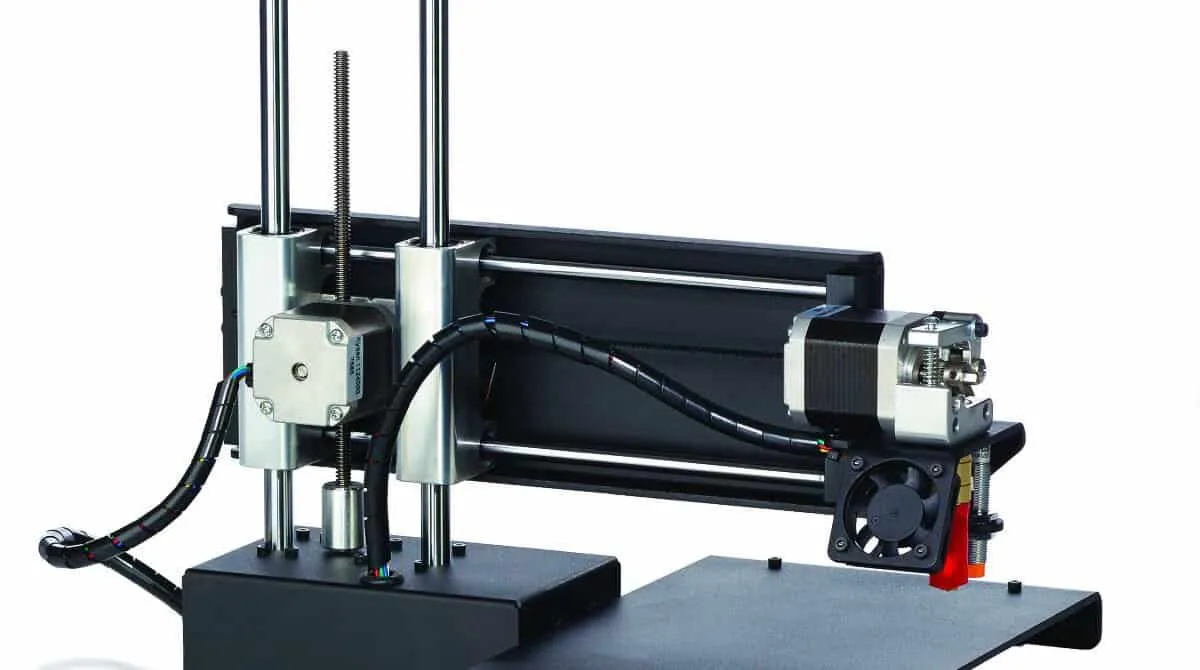
The body is powder coated steel with CNC machined aluminum parts and 12mm steel cast linear rails on all axes.
Once it’s assembled, this thing feels like a tank. Noticeably sturdier than most printers in its size class. The MakerGear M2 is the only other printer I’ve tested that has this same “nothing’s going to break” feel.
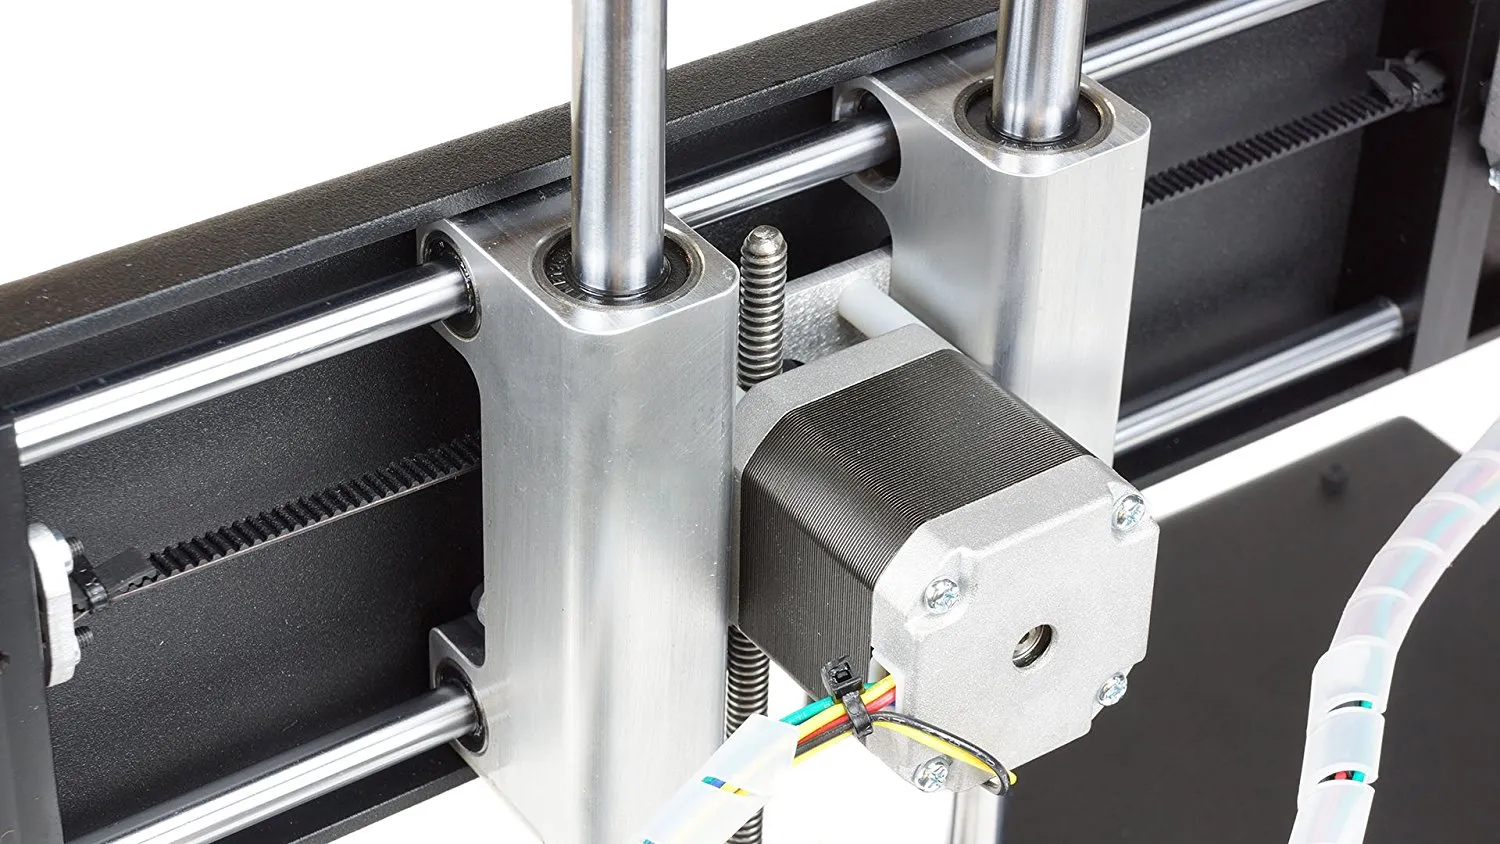
One thing I’ve noticed, and other users have flagged this too, is that the Z axis tower rails do double duty as load-bearing members. There’s no independent structure supporting the Z tower or ZY axis head.
The rails are solid cast steel, so this might be a non-issue in practice. But from an engineering standpoint, I’d want to re-check rail straightness after about a year of weekly use before I’m completely confident.
Construction details aside, the components are well chosen. GT2 belts, 20-tooth aluminum dual flange GT2 pulleys, and Nema 17 stepper motors.
Those are all standard for this class of printer, which is actually a feature, not a compromise. You can find 3D model files for the pulleys online and print replacements on this very machine.
I’ve read about people 3D printing GT2-style timing belts using flexible filament, though I haven’t found anyone who’s confirmed it works long-term. Since this Printrbot handles flexible material, printing a replacement belt is on my experiment list.
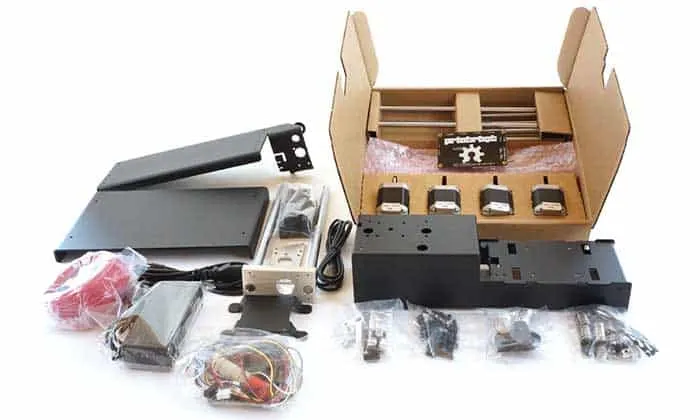
In The Box
First thing you see when you open the box is a sheet of paper that says “to get started visit printrbot.com/simplepro” (this redirects to http://printrbot.com/project/2016simple/).
The sheet lays out three simple steps: 1) Unbox, 2) Load filament, 3) Swipe to print. The website has more detailed instructions, videos, and links to additional resources.
The Printrbot Simple Pro ships mostly assembled with the following parts:
- Base Assembly
- Print Bed Assembly (optionally with heated bed, either pre-installed or upgraded later)
- Spool Rack
- Power Supply and Power Cord (12v 6A)
- Sample PLA filament
- Printrbot sticker
- Autodesk Fusion 360 one year subscription
- 5x blue print bed tape sheets
- Hex key tools for assembly
- Hex screws
If you order the heated print bed upgrade as well, you should also receive the following:
- Clear acrylic magnet holder plate
- New sheet of PEI print surface
- Heating board with wires attached
- Spring Steel print bed plate
- 11-inch braided wire wrap
- Rubber grommet for wiring hole
- Zip ties
- 10mm x 16 round button head hex screws
- Power supply
- Mini automotive 15 amp fuse (replaces the original 5 amp fuse)
Assembly and setup really do live up to the “Simple” branding. This was noticeably easier than most 3D printers I’ve worked with.
Assembly
Pre-assembled build time: 30 minutes
Un-assembled kit build time: about 5 to 6 hours
The following steps are what I followed for the pre-assembled Printrbot Simple Pro. I’m including additional steps if you bought the heated print bed, marked with [OPTIONAL HEATED BED STEP] after the step number.
1) [OPTIONAL HEATED BED STEP] Place the clear acrylic magnet holder plate on the print bed plate, lining up the screw holes. Note: no screwing yet.
2) [OPTIONAL HEATED BED STEP] Place the heating board with the white side up and wires to the right on top of the clear acrylic magnet holder plate, lining up the screw holes.
3) [OPTIONAL HEATED BED STEP] Using the #3 allen wrench, screw the four 10mm x 16 hex screws through the heating board and acrylic magnet holder into the main print bed plate.
IMPORTANT NOTE: FINGER TIGHTEN ONLY, DO NOT OVER TIGHTEN THESE FOUR SCREWS.
Over tightening these screws could break the white mask on the heating board and short out the copper heating elements. This is not repairable.
ANOTHER IMPORTANT NOTE: NEVER PRINT ON THE HEATING BOARD DIRECTLY!
According to the Printrbot instruction videos: printing directly onto the heating board with the calibration too low could cause the extruder nozzle to cut into the heating board, cutting or shorting the copper heating elements.
This would also destroy the heating board as this cannot be repaired.
4) [OPTIONAL HEATED BED STEP] Locate the spring steel print bed plate and the PEI print surface sheet. Since we’re going to stick the PEI surface sheet to the spring steel plate, you want to make sure there’s no dust or fibers trapped between them. Wash your hands twice with soap, rinse well, and dry with a lint free towel or microfiber cloth only.
5) [OPTIONAL HEATED BED STEP] Using a screen cleaning wipe or spray cleaner designed for cell phones or other electronic devices, clean the top of the spring steel plate. Dry the spring steel plate with a microfiber cloth or lint free towel.
6) [OPTIONAL HEATED BED STEP] Peel back one inch of the colored backing from the PEI sheet, and fold the colored backing over to itself.
7) [OPTIONAL HEATED BED STEP] Carefully, center the PEI sheet over the spring steel plate, lining up the edges as carefully as possible.
8) [OPTIONAL HEATED BED STEP] Starting from the center of the exposed one inch of the PEI sheet, stick it straight down onto the spring steel.
9) [OPTIONAL HEATED BED STEP] Using a microfiber cloth or lint free towel, press the one inch of exposed PEI sheet to the spring steel from the center outwards towards the edge of the sheet. Continue pressing down with the cloth in strokes making sure to rub carefully to prevent any air bubbles or pieces of dust or lint from becoming trapped between the sheet and the spring steel.
10) [OPTIONAL HEATED BED STEP] Slowly and carefully begin to peel the rest of the colored backing while using the cloth to press the sheet to the spring steel. Push from the center outwards to help prevent air bubbles. This PEI sheet application procedure is a lot like applying a screen protector to a cell phone or tablet.
11) [OPTIONAL HEATED BED STEP] Once the PEI sheet is completely attached, carefully peel the clear protective top layer off the top of the PEI sheet. Once you get a corner separated, the rest should peel off easily without pulling the PEI from the spring steel.
12) [OPTIONAL HEATED BED STEP] Gently slide the 11 inch braided wire wrap over the wires attached to the heating board.
13) [OPTIONAL HEATED BED STEP] Secure the 11 inch braided wire wrap over the wires with a zip tie very close to the heating board. Cut the excess tail from the zip tie.
14) [OPTIONAL HEATED BED STEP] Slide the rubber grommet over the wires and over the 11 inch braided wire wrap.
15) [OPTIONAL HEATED BED STEP] Secure the other end of the 11 inch braided wire wrap with a zip tie very close to the end of the braided wire wrap, making sure the rubber grommet is between the two zip ties. Cut the excess tail from the zip tie.
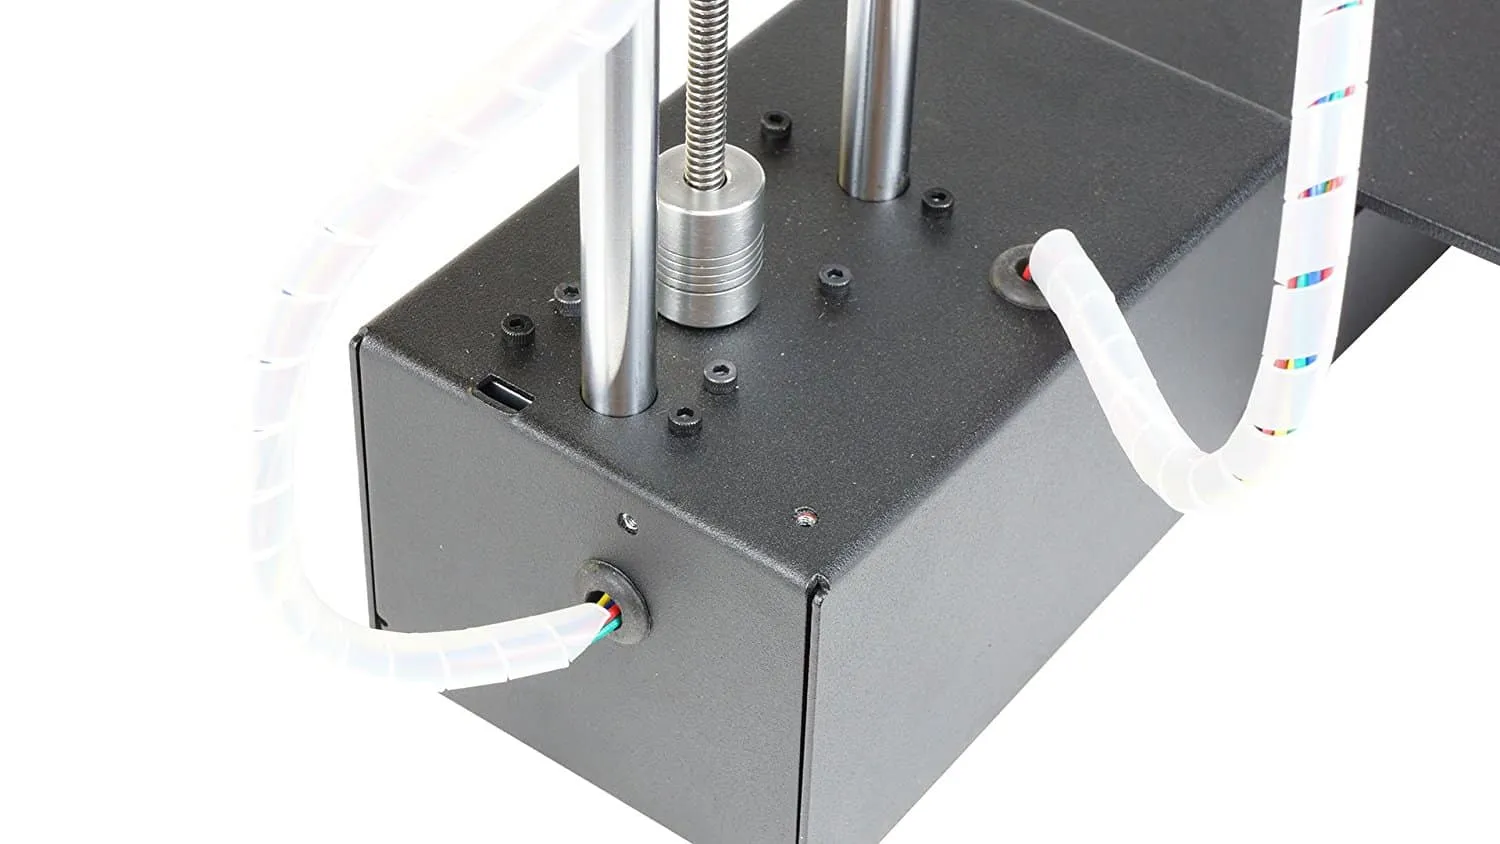
16) [OPTIONAL HEATED BED STEP] Gently thread the wires into the hole on the right side of the Printrbot Simple Pro base assembly, located just above the USB port. Guide part of the braided wire wrap into the hole, and secure the rubber grommet into the hole so that it sticks around the inside of the hole. The rubber grommet protects the braided wire wrapping and wires from the potentially sharp edge of the metal hole.
17) [OPTIONAL HEATED BED STEP] Attach the thermistor cable from the heating bed behind the end-stop wire port on the electronics board. The correct port has 2 pins and is labeled “BED-THERM”.
18) [OPTIONAL HEATED BED STEP] Install the remaining two red wires into both ports on the green terminal block on the other side of the Electronics board. These terminal blocks work similar to the screw-on terminal block for a car battery, however this terminal block is much smaller. Insert the wire so that the jacket is only just inside the terminal opening, then screw the terminal down to clamp onto (or bite into) the wire. Repeat for the other wire. Don’t over tighten these screws, but make sure the terminal screws are gripping well into the exposed wire ends. Screwing too tightly may cut the wires instead of just gripping them.
19) Locate the X axis motor connector wire inside the base assembly and connect it to the X axis motor. The X axis motor can be found already mounted on the underside of the print bed assembly.
20) Locate the end-stop wire on the print bed assembly and connect it to the electronics board inside the base assembly.
21) Position the print bed assembly on the base, making sure the print bed is aligned correctly with the motor back to the LCD screen and the motor axis towards the electronics boards. There is a plate under the print bed assembly that the X motor is attached to. This plate is rectangular and has four screw holes. It should be positioned so that the X motor hangs inside the base assembly, and the screw holes line up with the mount holes on the base assembly.
Note: make sure the wires connected to the base assembly are sitting inside the base assembly and not partly outside or sandwiched between the print bed assembly and base assembly.
22) Carefully slide the print bed to the right on the print bed assembly until two screw holes on the under plate are visible.
23) Screw two of the included 3mm x 10 rounded head screws through the under plate on the print bed assembly to the base assembly using the included #2 allen wrench. Note: Don’t over tighten these screws, so that if you need to fix anything later you can without having to replace screws or re-thread the holes.
24) Carefully slide the print bed to the left on the print bed assembly until the remaining two screw holes on the under plate are visible.
25) Screw the two remaining included 3mm x 10 rounded head screws through the under plate on the print bed assembly to the base assembly using the included #2 allen wrench. Note: Same deal - don’t over tighten these.
26) Locate the spool rack and screw it into the top handle by hand turning it counter clockwise into the provided spool rack connector hole.
Note: The spool rack is screwed in counter clockwise instead of the standard clockwise so that the filament spool doesn’t unscrew the spool rack during normal use.
27) [OPTIONAL HEATED BED STEP] Locate the spring steel plate with the PEI surface application pointing up, and place it so the holes align over the screws in the heating board of the print bed assembly. When setting the spring steel in place, you should hear a satisfying light magnet clip noise. Make sure the spring steel plate sits flat on the heating board.
28) [OPTIONAL HEATED BED STEP] Unscrew the Z axis tower assembly from the base assembly, and gently set it on your work surface to the side with the USB plug, leaving the wires attached.
29) [OPTIONAL HEATED BED STEP] Using a pair of needle nose pliers, or an automotive fuse pull tool, carefully pull the brown 5 amp fuse up and slide it out to the side. Remove the 5 amp fuse from the base assembly and save or discard. It may be easier to first slide the on/off toggle switch out, being careful in doing so, and replace it afterwards if you do.
30) [OPTIONAL HEATED BED STEP] Replace the brown 5 amp fuse with the blue 15 amp fuse. If you removed the on/off toggle switch, be sure to replace it exactly as it was before.
31) [OPTIONAL HEATED BED STEP] Set the Z axis tower assembly back in place on top of the base assembly and secure it with the original screws. Be sure no wires are trapped between the base assembly and the Z axis tower assembly base plate, and make certain the ribbon cable for the Z axis tower is in its slot and can move freely back and forth into and out of the slot in the base assembly.
32) [OPTIONAL HEATED BED STEP] Note that now you are using the new power supply included with the heated print bed upgrade kit. This power adapter plugs into the 6 pin ATX port on the back of the base assembly, instead of the barrel style port.
33) Rejoice! Assembly is completed!
Note: If you buy the unassembled kit, there’s a much longer set of instructions on the website along with build videos from the 3D printing community on YouTube.
I won’t cover the full kit assembly here since it would take over the review. I will say the instructions seem to skip a few steps and could use some polish.
Connecting the LCD display to the power board isn’t covered at all, for example. And the instructions really need more detail on aligning the print bed, axes, and extruder gears. That’s probably the trickiest part of the unassembled build.
Calibration
34) Apply blue print bed tape to the print bed (heated print beds come with a PEI coating on the print surface so you don’t need the tape).
35) Plug in and power on your printer using the on/off toggle switch.
36) Locate and tap the settings icon (looks like three stacked lines, similar to android style menu icons). The settings icon should be in the bottom left corner of the LCD screen, once the OS boot completes.
Note: The website says lower right corner, however it is actually in the lower left corner of the LCD screen.
37) Locate and tap the filament icon (two crossing arrows pointing right). In the settings menu this filament icon should be the top left icon.
38) Tap the large yellow button labeled LOAD FILAMENT.
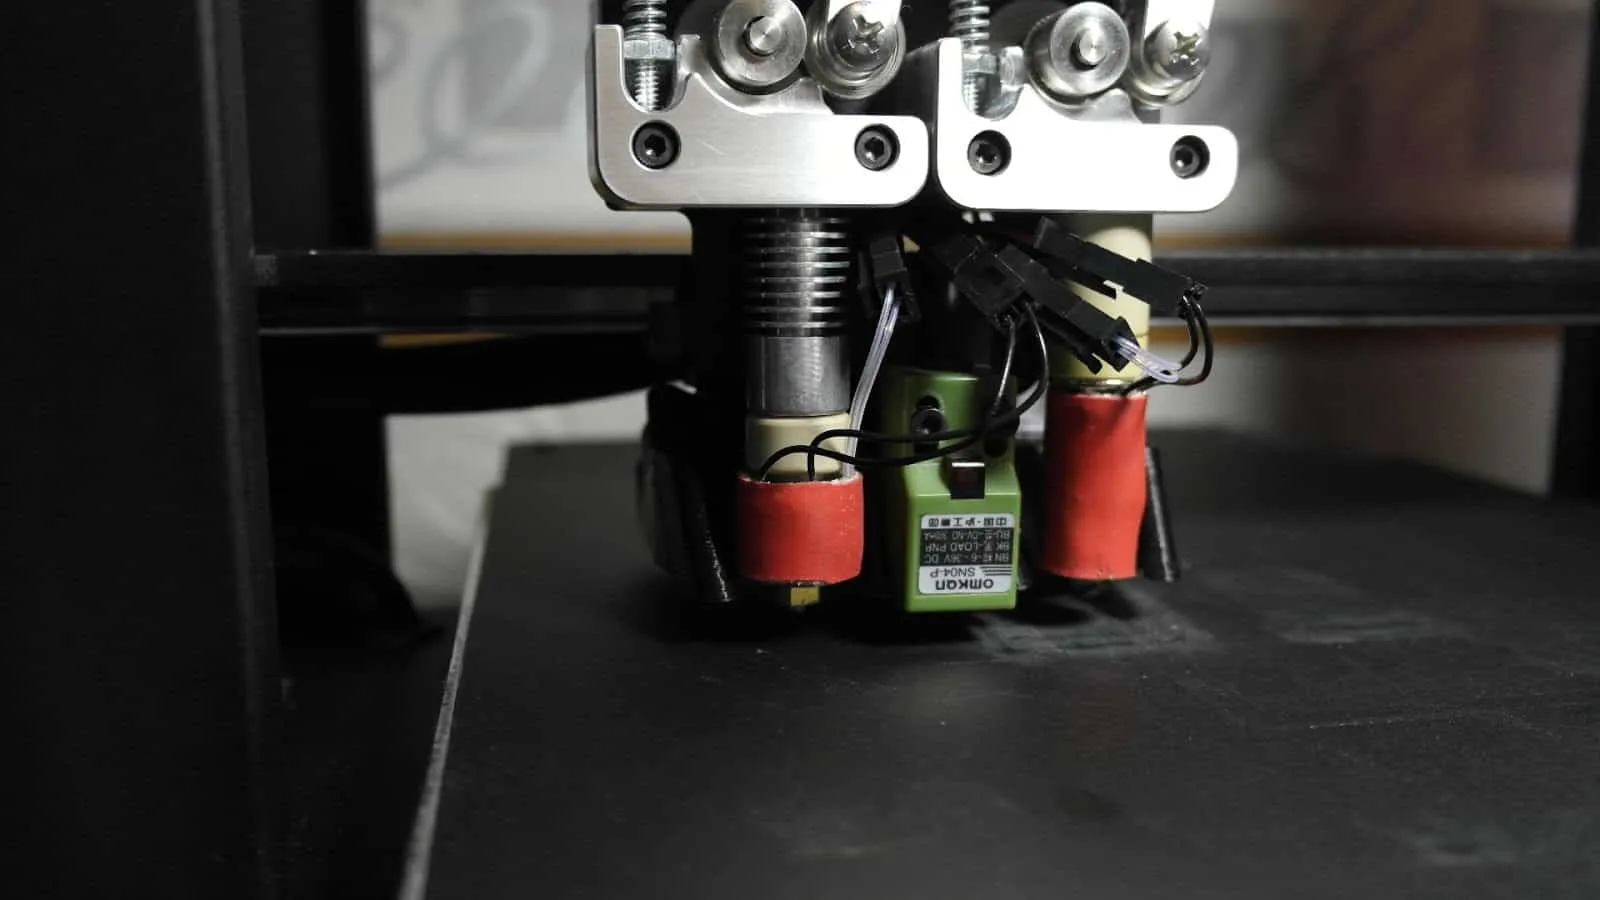
39) The screen now displays “Heating Extruder”, and shows a progress bar. At this time there should be red LEDs shining from the underside of the extruder, indicating that the extruder may be hot. Wait for the heating to complete and the screen instructions to change.
40) Once the extruder has finished heating up, the screen should now display “Load new filament now…” and the extruder head lights may have changed color.
41) Set the spool on the spool rack, so that the filament line unrolls from the top, or counter clockwise.
42) Hold the lever on the top and front of the extruder down and feed the end of the filament into the extruder between the gears, then release the lever so the gears can pull the filament. Note: Best practice is to gently push the filament into the extruder until the gears catch it, rather than forcing it all the way down to the nozzle.
43) Once the filament is loaded it may begin to melt some filament onto the print surface. Tap the large black “DONE” button and the extruder will retract after releasing some additional melted filament, then the screen returns to the Settings menu.
44) You can now exit the settings menu using the X in the lower left hand corner (where the settings icon was before).
… to continue calibration, follow test print instructions, and then see calibration part 2 below …
First Test Print
45) Make sure you’ve exited the settings menu. In the vertical title bar along the left of the screen you should see the section label “Projects”.
46) Swipe the screen left or right to locate the project called “First Test Print”.
47) With “First Test Print” selected (showing on the screen), locate and tap the yellow open button.
48) Locate and tap the yellow Print button.
49) As the Printrbot website suggests, keep your “finger on the trigger” for this first print - meaning keep your finger near the on/off toggle switch on the rear of the base assembly. This is in case the extruder nozzle sits too close to the print bed. If it’s too close you’ll see the print bed tape getting torn by the nozzle, and you’ll probably hear a clicking noise from the extruder since the filament can’t flow. If that happens, flip the toggle switch off right away.
50) Before the Printrbot Simple Pro starts printing, you’ll notice two automatic steps: First, the printer aligns the nozzle and auto leveling sensor on three positions for automatic leveling. Second, it prints an initial test line of material at the front of the print bed as part of alignment.
51) Now the first test print begins - a simple box that is 20mm x 20mm XY, and around 2 to 4 mm tall.
52) While printing, the screen will (or should) show a few stats including estimated time to completion, filament required, and other info. The first test print should take less than 10 minutes.
53) Once the print is done, there are a few ways to remove it from the bed: 1) run a knife under the model to separate it (not recommended - it may tear the tape or PEI), 2) peel the blue print bed tape from the bed and then separate the tape from the model (if you used the tape), 3) if you have the heated bed, wait for it to cool, remove the top plate (it’s held by magnets for easy removal) and gently twist the spring steel surface - the model should pop right off, 4) with a heated bed the model should come off easily while the bed is still warm, or 5) use a heat gun on a low setting to gently warm the bottom of the model where it meets the bed.
Calibration Part 2
If the nozzle tore the blue print bed tape during the first test print, you need to calibrate the extruder nozzle - the LCD calls this the “Hotend Offset”:
54) Turn the Printrbot Simple Pro back on.
55) Once the OS boot has completed, locate and tap the settings button in the lower left corner of the screen.
56) In the settings menu, locate and tap the calibrate icon, which looks like up and down pointing triangles on top of each other. It should be in the top center settings menu location.
57) The calibrate screen will now show up. The hotend offset (basically the extruder nozzle height) will probably default to +0.1 if you got a pre-assembled kit. Either way, if the first test print tore the tape, tap the up button to raise the hotend offset one or two tenths higher.
58) Locate and tap the yellow SAVE button at the bottom of this screen.
59) Tap the X to exit the settings menu.
60) Swipe to the First Test Print project, and go back to step 49 above in the First Test Print section.
61) Repeat the calibration until the bottom layer of the First Test Print comes out just right. Check the images on the website getting started guide to see whether the first layer is too low, too high, or spot on.
Software
The LCD touchscreen on the Printrbot Simple Pro was built to work hand-in-hand with printrbot.cloud, their web-based software.
The concept is simple: connect to WiFi, download projects, and let the cloud handle slice processing. It works well in practice, and the interface is clean and easy to navigate.
Things get slightly more involved when you’re designing your own models. You’ll create a project on printrbot.cloud, upload your design, then download it to the printer over WiFi.
Their getting started page walks through account creation, project setup, and downloading. I’ll cover the WiFi connection steps in the Connectivity section below, since that process can be confusing if you’ve never set up a device this way.
No WiFi? Prefer handling slicing on your own machine? You can connect via USB cable (USB A to USB B). The documentation lists Cura 2 as compatible, and other slicer software will likely work with some configuration.
USB is generally faster if your WiFi is sluggish, and it means fewer potential interruptions mid-print.
Some users have actually cracked open the base to access the SD card behind the LCD screen. You can apparently pre-load models directly onto the card and bypass WiFi or USB altogether.
Honestly though, the disassembly and reassembly probably takes longer than just plugging in a cable. It only makes sense if you don’t have internet access or you’re bringing the printer to a maker space or demo.
Connectivity
WiFi is probably the single biggest upgrade on the Simple Pro over previous models. It definitely cuts down on steps, but the initial connection process can trip you up if you’ve never configured a device this way.
You’ll be bouncing between your computer and the printer during setup. I’ve labeled each step with (Printrbot) or (Computer) so you know where to be.
1) (Printrbot) Turn your printer on.
2) (Computer) Connect your computer to the WiFi network with the SSID of “printrbot”. This network runs on the 2.4 GHz WiFi frequency, so all computers with WiFi should connect without trouble. There shouldn’t be any security on this printrbot WiFi network.
3) (Printrbot) Tap the settings icon on your printer screen.
4) (Printrbot) Tap the WiFi icon on your printer screen settings menu.
5) (Printrbot) Write down or memorize the IP address listed on the WiFi screen on your printer.
6) (Computer) Open a browser on your computer.
7) (Computer) In your browser address bar, enter the IP address from your printer WiFi screen, and click Go or press enter.
8) (Computer) The page that loads has three boxes: name - Enter a name for your printer. wifi ssid - Enter the SSID of your home WiFi network. wifi password - Enter the WiFi password (or passphrase) of your home WiFi network.
Note: The ssid and password are case sensitive. Make sure you match the upper and lower case exactly for your WiFi network settings.
9) (Computer) Click the “Save” button. You should now see a new page that says only: {“wifi”:“configuration updated, restarting…”}
10) (Computer) Connect your computer back to your normal WiFi (the SSID you entered above in Connectivity Step 8).
11) (Printrbot) Once the Printrbot finishes restarting, tap the settings icon again, and then tap the WiFi icon again.
12) (Printrbot) The values in the WiFi screen will have changed. Write them down or keep this screen open for use on your computer shortly.
Printrbot Cloud
13) (Computer) In your browser, set the address bar to printrbot.cloud and press enter.
14) (Computer) Login to printrbot.cloud (If you need to create an account, do that first, using the serial number from the WiFi screen on the Printrbot).
15) (Computer) Once you’re logged into printrbot.cloud for the first time, there should be a large yellow notice at the top of the page telling you that you have no printers connected. Click “Add new printer” in that yellow box, then enter your printer name and IP address from the Printrbot WiFi screen. If you’ve set a password for your Printrbot, enter that here as well. Then click “Save”.
16) (Computer) If you have multiple printers, or already have one set up and need to edit it or add another, you’ll find the printers listed in a drop down box in the top right of the printrbot.cloud site (after logging in). Click the printer name for the drop down menu, then either click “Edit” under the printer you want to change, or click “Add new printer”.
17) (Computer) If your printrbot.cloud account and your Printrbot Simple Pro are successfully connected, you’ll see the name of your printer in the upper right corner of your dashboard along with a green indicator box next to it.
18) (Computer) Now you can create projects on your cloud dashboard, as well as connect to your MyMiniFactory and Thingiverse accounts to import models and collections. Creating a project from the main dashboard lets you enter a name and description, then takes you to the project page where you can upload the 3D model file and a project picture. You can also click the Materials button on the left nav bar (looks like a leather hide icon) to add new filament types to your account and push the updated materials list to your printer.
Additional Notes
Reading through all that might make it sound complicated, but it’s honestly simpler than most 3D printers on the market.
Some users find the WiFi download process a bit slow since the cloud has to process slices before the printer can pull down the G-code. It does add some lead time, but it’s way simpler than manually running slicer software yourself.
All things considered, there are fewer total steps than with most other printers I’ve set up.
One critical warning, and both the community and the Printrbot website hammer this point: if the printer is updating its firmware, DO NOT turn it off. Interrupting a firmware update will brick the software.
If that happens, you can recover by opening up the base, pulling the SD card from the LCD board, and replacing files manually from your computer. But obviously, just don’t touch the power switch during updates.
Firmware updates can also be done manually through WiFi or USB. Instructions are on the Printrbot site.
One limitation to be aware of: printrbot.cloud doesn’t support heated bed printing yet. If you bought the heated bed upgrade, you’ll need to print via USB or push G-code through the cloud manually. Printrbot’s support pages cover both methods.
My first real print came out looking sharp with only a few minor imperfections near the bottom. Tweaking the hotend offset (nozzle height) mostly fixed that.
Like every 3D printer, there’s a faint layer-line pattern along the edges. Fine grit sandpaper or an acetone vapor bath smooths it out depending on the material.
Honestly though, prints from this Printrbot barely need post-processing. Resolution is high enough that the lines aren’t distracting. Sanding or acetone is really only worth the effort if you’re blending printed parts with metal or cloth components.
Quality has actually improved after the first several runs too. The machine seems to hit its stride after a bit of break-in, producing some genuinely impressive functional pieces.
Print Quality
Print quality is the number one question people ask me about any printer I review. So let me be upfront: if you’re new to 3D printing, your first prints from any machine will probably underwhelm you.
A lot of people picture Star Trek’s Replicator and expect perfect objects on demand. We’ve come a long way, but we’re not there yet.
Every 3D print I’ve ever produced, on any machine, has visible layer lines. These printers stack melted material one layer at a time, and the smallest possible layer thickness determines how obvious those lines are. Think pixelation on a screen.
That’s not a flaw in any specific printer. It’s just where the technology stands. Sanding and acetone vapor baths help depending on the filament.
With that context set, the Printrbot Simple Pro puts out genuinely good prints. Most objects need little to no support material, even on overhanging sections.
Excess material problems were rare. Out of close to 30 prints, only two had noticeable burrs, and maybe eight had a few filament hairs in tight corners that needed picking off.
Where this printer really impressed me was functional parts. I printed several nut and bolt combinations, gears, and clock components.
Every single one worked straight off the bed. No sanding, no cleanup. The printed nuts threaded smoothly onto the printed bolts with zero variation between threads. That kind of precision is something the Ultimaker 2 also delivers, but at a much higher price.
This printer doesn’t just make prototypes. It produces genuinely usable parts for clocks, small electronics enclosures, and articulated toys.
My favorite print so far? A set of wall-mount brackets for WiFi access points around the house. Quality was good enough that I installed them with zero post-processing. My neighbor actually asked what store I’d bought them from. For a cheaper option in the same Printrbot family, the Printrbot Play delivers impressive results at under $400.
This printer isn’t going anywhere. I’ll be using it for a long time.
Frequently Asked Questions
Yes. The Printrbot Simple Pro connects to your home WiFi and uses the printrbot.cloud web-based software for downloading projects and processing slices. You can also print via USB using Cura 2 software.
The pre-assembled version takes about 30 minutes. The un-assembled kit takes 5 to 6 hours. The optional heated print bed upgrade adds about 30 minutes to assembly.
The printer achieves 50-micron resolution, which is quite good for its price class. Printed nuts screw smoothly onto printed bolts with no variation between threads.
Final Thoughts
The Printrbot Simple Metal Pro is one of the strongest printers at this price point. It works for beginners who want to tackle advanced projects right away, and it’s just as solid for experienced users looking for an upgrade.
If you have questions or want to share your own Printrbot experiences, drop them in the comments below. And if you enjoy building printers from scratch and want to save a few bucks, take a look at the Printrbot Metal Simple Kit.


