The Printrbot Play 3D Printer is the most affordable machine in Printrbot’s lineup. They market it as entry-level, and the price reflects that.
I don’t usually open a review talking about value. But in this case, the value is the story. The Play is one of the best printers I’ve tested, period. And it might be the single best deal in 3D printing right now.
It’s the replacement for the old Simple MakersKit and started life as a minimal viable product concept. But pick it up and it feels premium. You can tell every part was selected with cost efficiency in mind, but that’s not the same thing as “cheap.” You’re just getting dramatically more for your dollar than other printers in this range deliver.
The Design

Printrbot Play 3D Printer
A steel-framed entry-level printer that punches way above its weight. Auto bed leveling and print quality that honestly rivals machines costing four times as much.
Pros
- Print quality rivals printers costing 4x more
- Extremely rigid and durable construction
- Automatic bed leveling eliminates manual calibration
Cons
- No heated bed included
- Cannot easily see first layers being printed
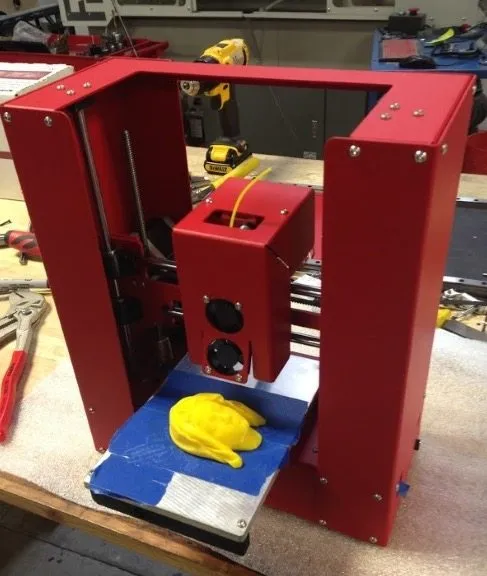
For a budget printer, the Play has some real heft to it. The frame is powder-coated steel, available in white or black.
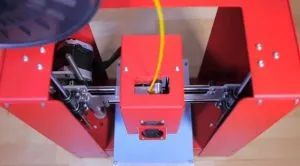
The x-axis and extruder carriage are built on sheet metal. Unlike older Printrbot models that moved the print bed around, this one moves the extruder instead. The carriage is aluminum.
The sheet metal work here is some of the best I’ve seen on any printer. Period. It immediately told me Printrbot wasn’t cutting corners on this design.
That kind of precision makes assembly easier and prevents the sort of failures and misalignments that tend to creep in over time. Even if you buy the pre-assembled version, the tight tolerances help with long-term reliability and repairs. The Printrbot Metal Simple Kit has this same obsessive hardware quality if you want a bigger build area. Like all Printrbots, the Play uses a bed probe to auto-compensate for any slant in the bed, so the bed assembly is just an aluminum slab bolted straight to the frame.
Belt tension is the only manual adjustment you’ll make. Clear instructions cover that. Everything else is either software-controlled or fully automatic.
The base houses mounts for the electronics, bearings, z rods, and motor. For linear motion, Printrbot went with precision 8 mm rods and LM8UU bearings, attached to the frame with injection-molded plastic and Delrin fittings.
If that means nothing to you, here’s the short version: this thing is rock solid. The parts quality is genuinely impressive at this price.
The Play is actually more rigid than full-size printers like the Prusa Mendel. The z-axis is only driven on one side and the bearing setup isn’t ideal for preventing jams, but the aluminum backbone keeps both sides in sync without any fiddling.
I actually tried picking up the printer and moving it around mid-print. It barely affected the output. That honestly blew me away.
Photo Gallery

Key Specifications
| Spec | Detail |
|---|---|
| Build Volume | 4 x 4 x 5 inches |
| Layer Resolution | 100 - 300 microns |
| Filament Type | PLA recommended (1.75 mm) |
| Connectivity | USB |
| Bed Leveling | Automatic with bed probe |
| Price Range | Budget-friendly |
The Print Quality
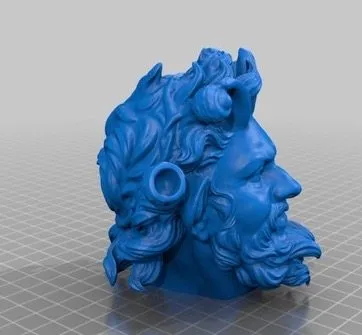
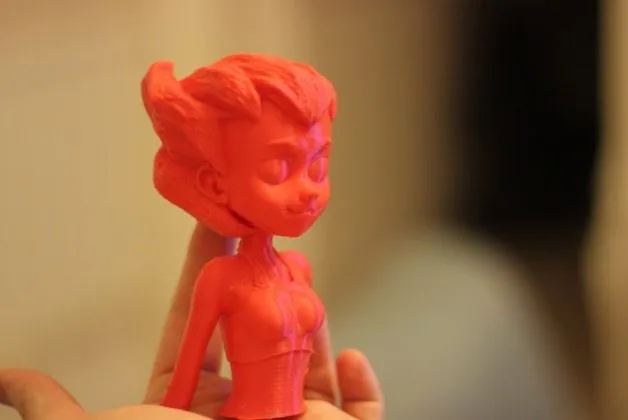
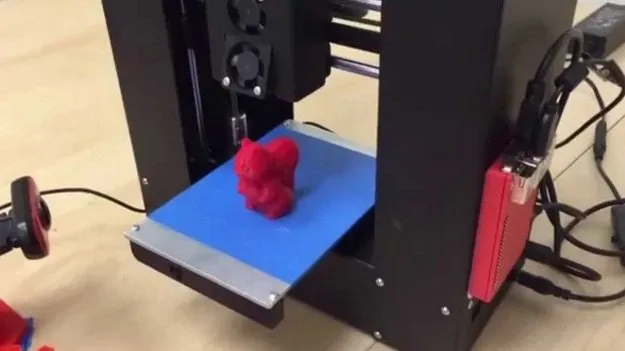
I’ve tested printers that cost four times as much and produce roughly the same output as the Printrbot Play 3D Printer. My first print used clear PLA.
The only thing I adjusted beforehand was the nozzle height over the bed, done through firmware. Speeds, extruder movement, everything else stayed on defaults.
It’s not quite as consistent as premium machines like the Ultimaker 2, but for an entry-level printer it’s seriously impressive. Corner sharpness, bridges, edges. Everything comes out solid with zero tuning.
What a budget machine can produce these days is honestly wild. My unit has the classic UBIS hot end, though Printrbot is apparently rolling out an all-metal UBIS upgrade across their lineup.
Good news: the Play’s carriage accepts that upgrade too.
Two fans sit at the front. One blows down onto the print for PLA cooling, the other faces inward as a heatsink for the hot end.
After a bunch of prints, this cooling setup proved itself. No warping on any finished models. The Monoprice Maker Select gave me more adhesion headaches by comparison, probably because it doesn’t have auto-leveling. One thing to watch: if you leave filament loaded and don’t print for a while, expect a clog.
That’s par for the course with any 3D printer.
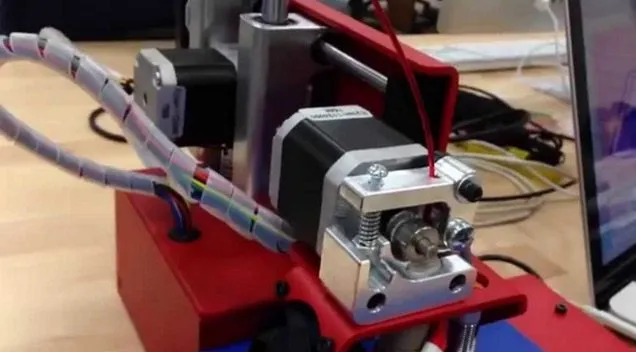
The extruder is aluminum, a streamlined upgrade from the Alu Extruder v1 found in older Printrbots. It uses a spring-loaded lever with adjustable tension.
One gripe: you can’t tweak the idler tension without pulling off the fan shroud. It’s tedious until you find a tension setting that works for your filament.
The exposed screws might look sketchy, but that’s how most extruders are built. Just make sure everything’s tight during assembly.
One more thing worth mentioning: you can’t easily see the first few layers printing because the print block is so large. If you want to film your prints or watch them closely, that could be a dealbreaker. For me, the results spoke loudly enough that I didn’t mind.
Cable Management
Earlier versions of the Printrbot Play 3D Printer had messy cable management that turned repairs and part swaps into headaches. That’s been cleaned up.
The wiring now is well-organized with no strain on any connections. Everything runs through a protective sleeve, and there’s a reinforced flap near the bend point to prevent wear over time.
Just keep an eye out for the wiring sliding over the edge of the bed. That area isn’t actually used for printing, so it’s not a big deal. Easy fix if it happens.
Flexibility
Budget printers always come with compromises. Let’s talk about where the Play falls short.
The build area is on the smaller side, though it’s typical for entry-level machines. My rule of thumb: don’t go smaller than 4 x 4 x 5 inches for the x, y, and z axes. Anything less feels too cramped. The Play lands right at that threshold, which was plenty for my projects without hogging desk space. If you need room for bigger models, the Robo 3D R1 Plus has an 8 x 9 x 10 inch bed that gives you way more real estate.
You’d be surprised what fits in 4 x 4 x 5 though. A regular coffee mug, for example.
The bigger limitation is no heated bed. That makes ABS and certain other plastics harder to work with since adhesion suffers.
PLA prints beautifully on unheated blue tape. If you want to upgrade later, slapping a heater onto the bottom of the bed is straightforward. Get it to 80 degrees Celsius and you’re good. The MakerGear M2 ships with a heated bed that hits 110 degrees Celsius right out of the box, if that’s a priority.
You may also want a beefier power supply if you go the heated bed route. Without one, the stock supply does just fine, and PLA prints will look great regardless.
ABS is doable on this machine, but PLA is where it really shines.
Frequently Asked Questions
Yes. Whether you buy it pre-assembled or as a DIY kit, the price is the same. Building it yourself takes about 4 hours and helps you understand how the printer works.
No, but you can easily add one by sticking a heater onto the bottom. At 80 degrees Celsius it works well. You may also want a better power supply if you add the heated bed.
PLA works best on the unheated bed with blue painter's tape. ABS is possible but PLA produces significantly better results.
Final Thoughts
Not much left to say about the Printrbot Play 1505 3D Printer. Pre-assembled or DIY kit, same price either way.
I went the DIY route and genuinely enjoyed the process. Building it yourself teaches you how the machine works, which pays off later when you’re troubleshooting. Took me about 4 hours, and all instructions are included.
There’s nothing flashy about the Play on paper. What it does have is print quality that rivals machines costing several times more. That’s exactly what it was designed to do. Out of every printer I’ve tested in this price range, the Play is my favorite. The Dremel Idea Builder and the FlashForge Finder are two other solid picks in this budget tier.
Prints well. Looks good. Reliable. Affordable. That’s a tough combination to beat.


